

What is Flowise?
Flowise is an open-source, low-code platform for visually building, managing, and interacting with AI agents and large language model (LLM) workflows in a chat-based environment. Its drag-and-drop interface allows users to compose AI agents into interconnected, LLM-powered workflows with little to no programming knowledge.Use Cases
You can leverage Flowise-Zenrows integration to drive several business opportunities. Here are some of them:- Product research: Discover the best marketing position for new products with insights from scraped data.
- Demand forecasting: Scrape products’ data to predict the demand ahead of competitors. Make data-driven decisions on re-stocks and pricing.
- Real-estate intelligence: Collect real-estate data and analyze it to gain data-driven investment insights.
- Competitor’s research: Gather competitor’s data for information gain and predict their next moves.
- Product optimization: Collect customers’ reviews, ratings, and other metrics from social platforms, review sites, and brand pages and fine-tune products to meet consumers’ expectations.
- Lead generation: Collect quality lead contacts from various sources and automate captures, outreaches, and follow-ups.
- Product recommendation: Scrape and analyze relevant product data points to recommend the best deals to potential buyers.
Basic Integration: Amazon Product Scraper
Let’s start by building a simple Amazon product scraper workflow that fetches data using Zenrows and returns it as a response via the Flowise chat box. We’ll use the Flowise Agentflows for this tutorial. The Flowise platform is accessible locally or remotely via the official Flowise website. If you use Flowise remotely via the website, no installation steps are required. However, the local setup requires installing Flowise globally to run a local server. In this guide, we’ll use the local setup, starting with the installation and server startup steps.Step 1: Install Flowise and set up a server
This tutorial assumes you’ve set up Node.js on your machine. Otherwise, download and install it from the official website.- Install the
flowisepackage globally: - Run the
flowiseserver. The command below starts a server that defaults tohttp://localhost:3000: - Visit this URL to launch the Flowise interface.
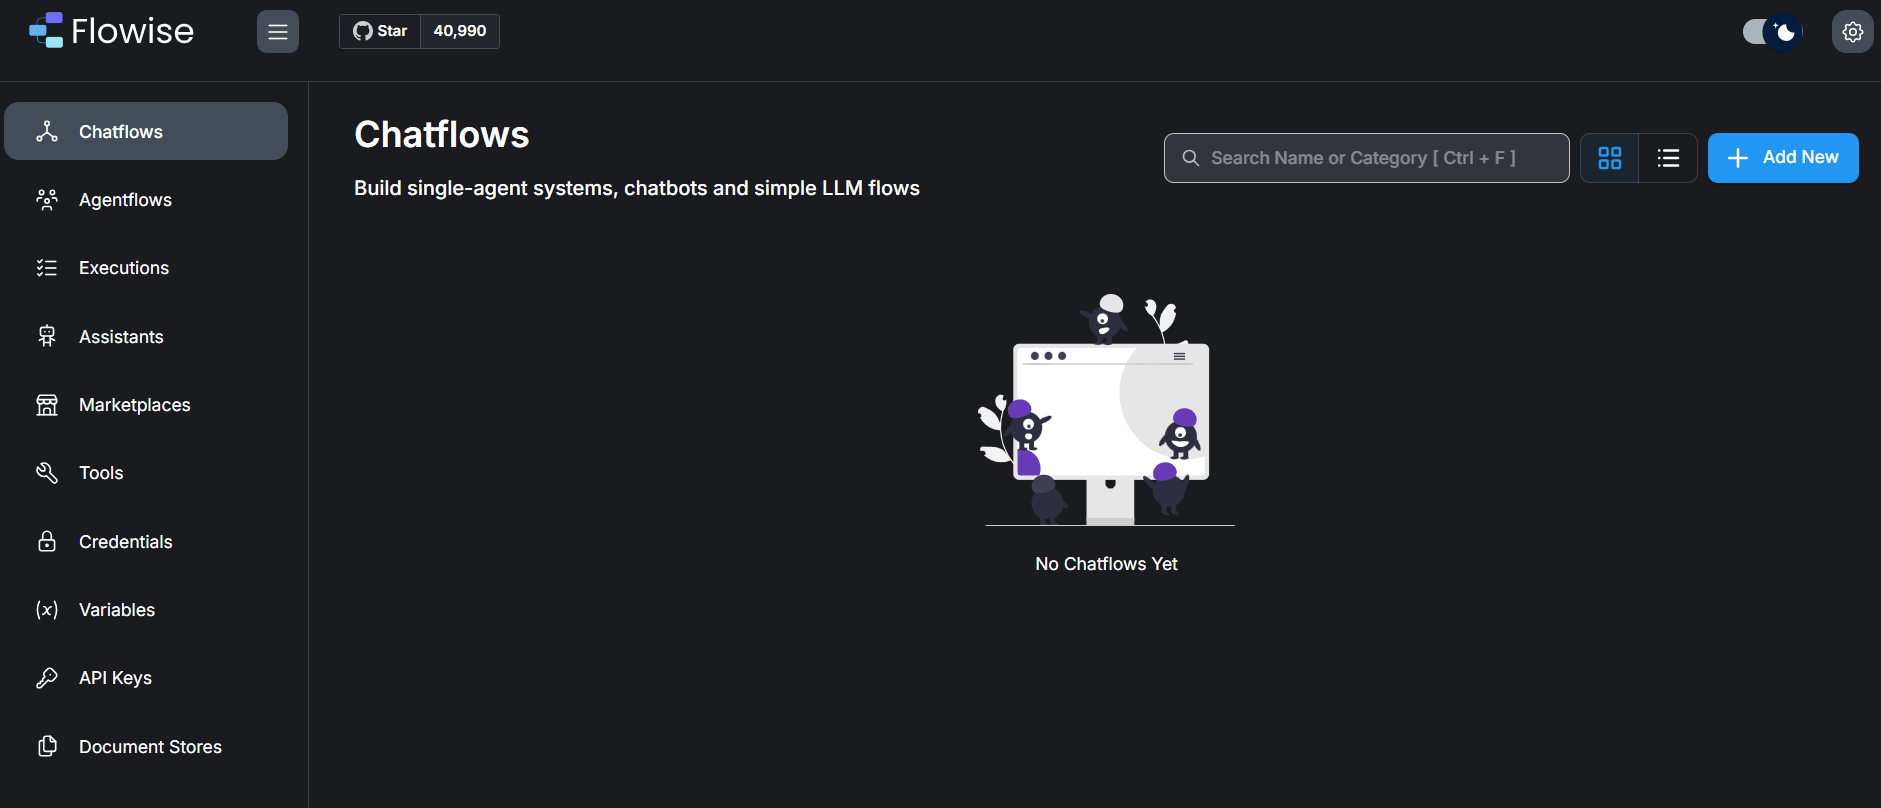
- Complete the initial registration steps, and you’ll get to the platform’s dashboard, as shown below:
Step 2: Add Zenrows API Key to Flowise environment variables
Adding your Zenrows API key to the Flowise environment variable makes it accessible across the platforms.- From the dashboard, go to Variables.
- Click
+ Add Variableat the top-right. - Fill in the Variable Name field with the name of your API key. Then, paste your Zenrows API key in the Value field.
- Click
Add.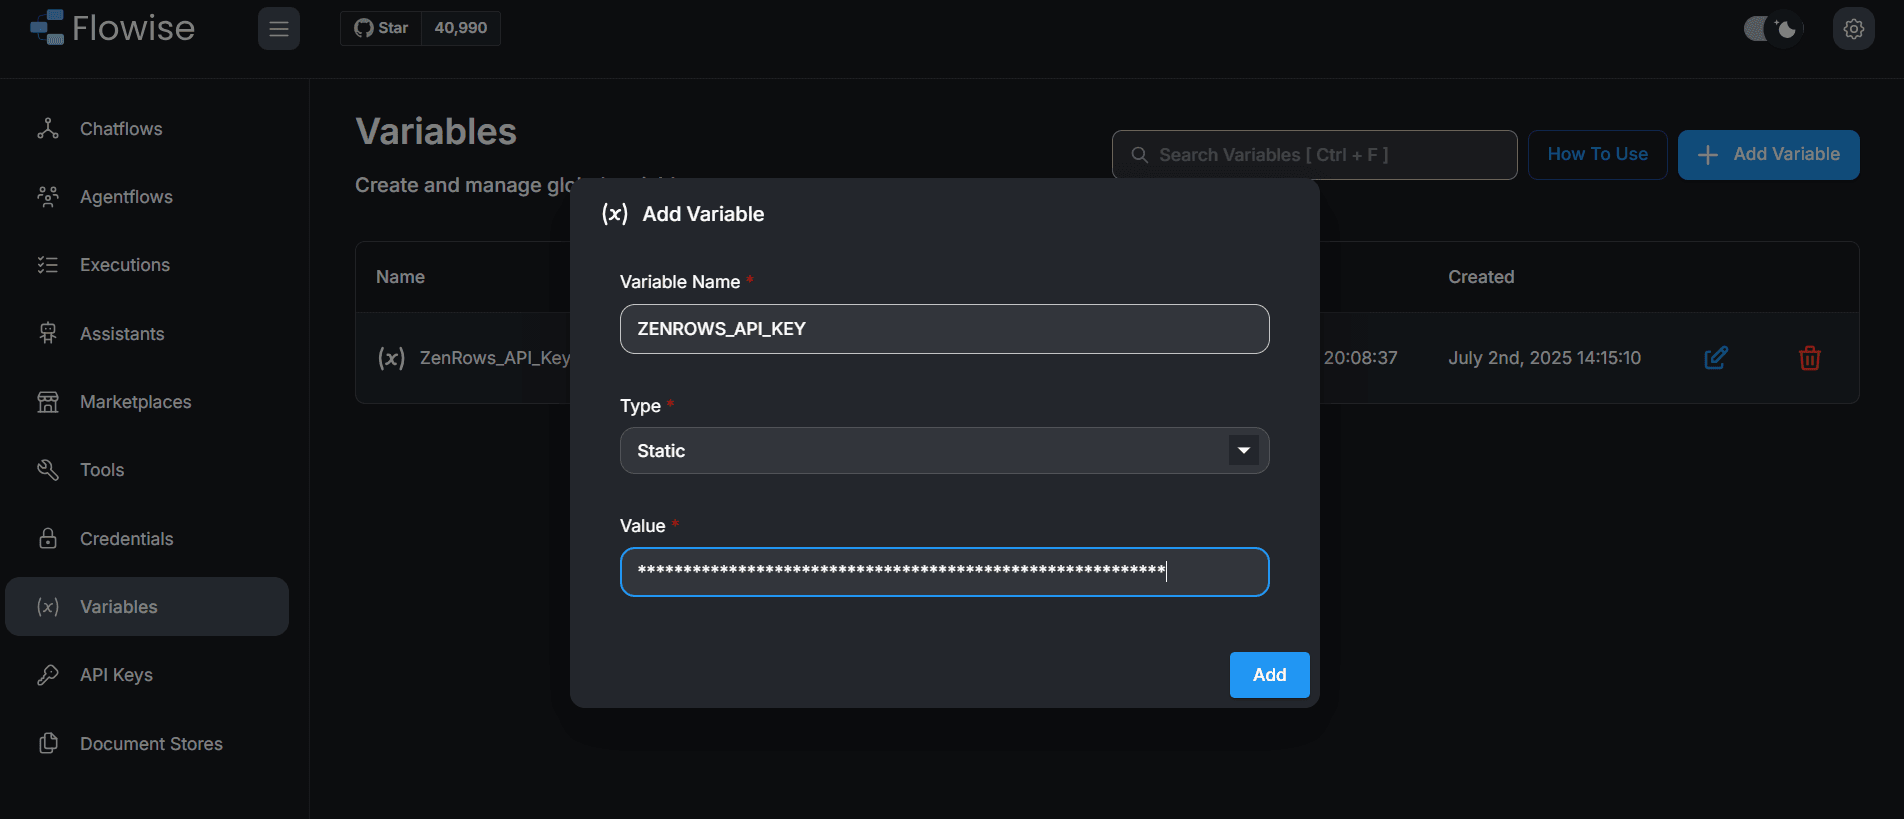
Step 3: Initiate a new Agentflow
-
Go to Agentflows and click
+ Add Newat the top right to open the Flowise canvas.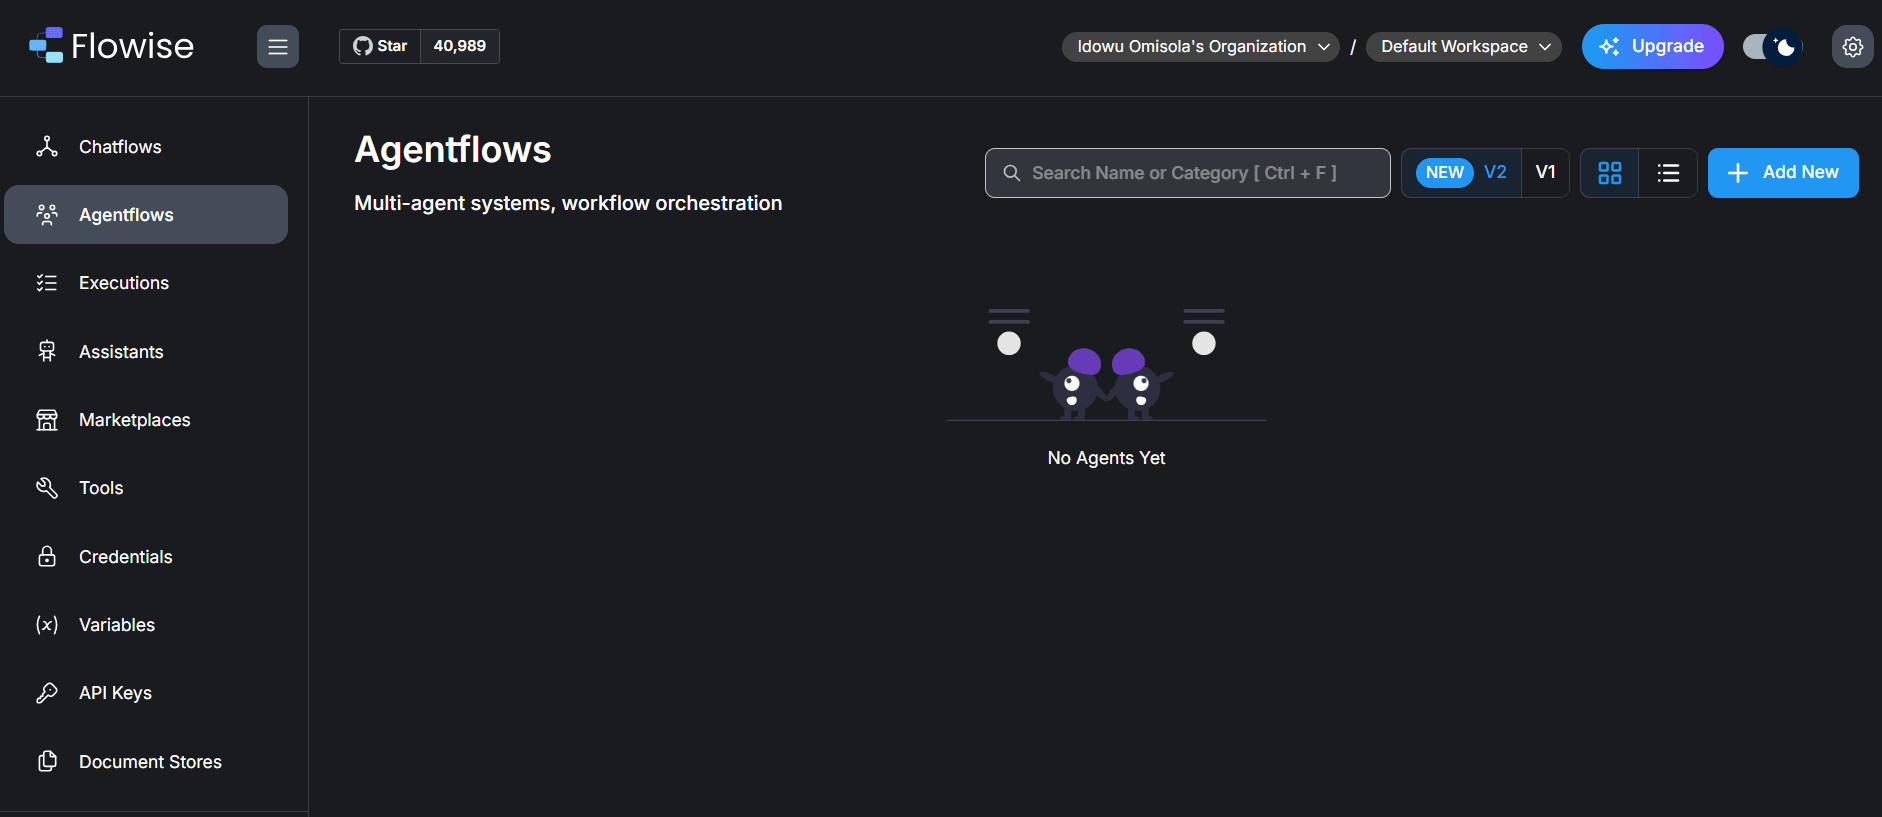
-
Once in the Flowise Canvas, click the save icon at the top right.
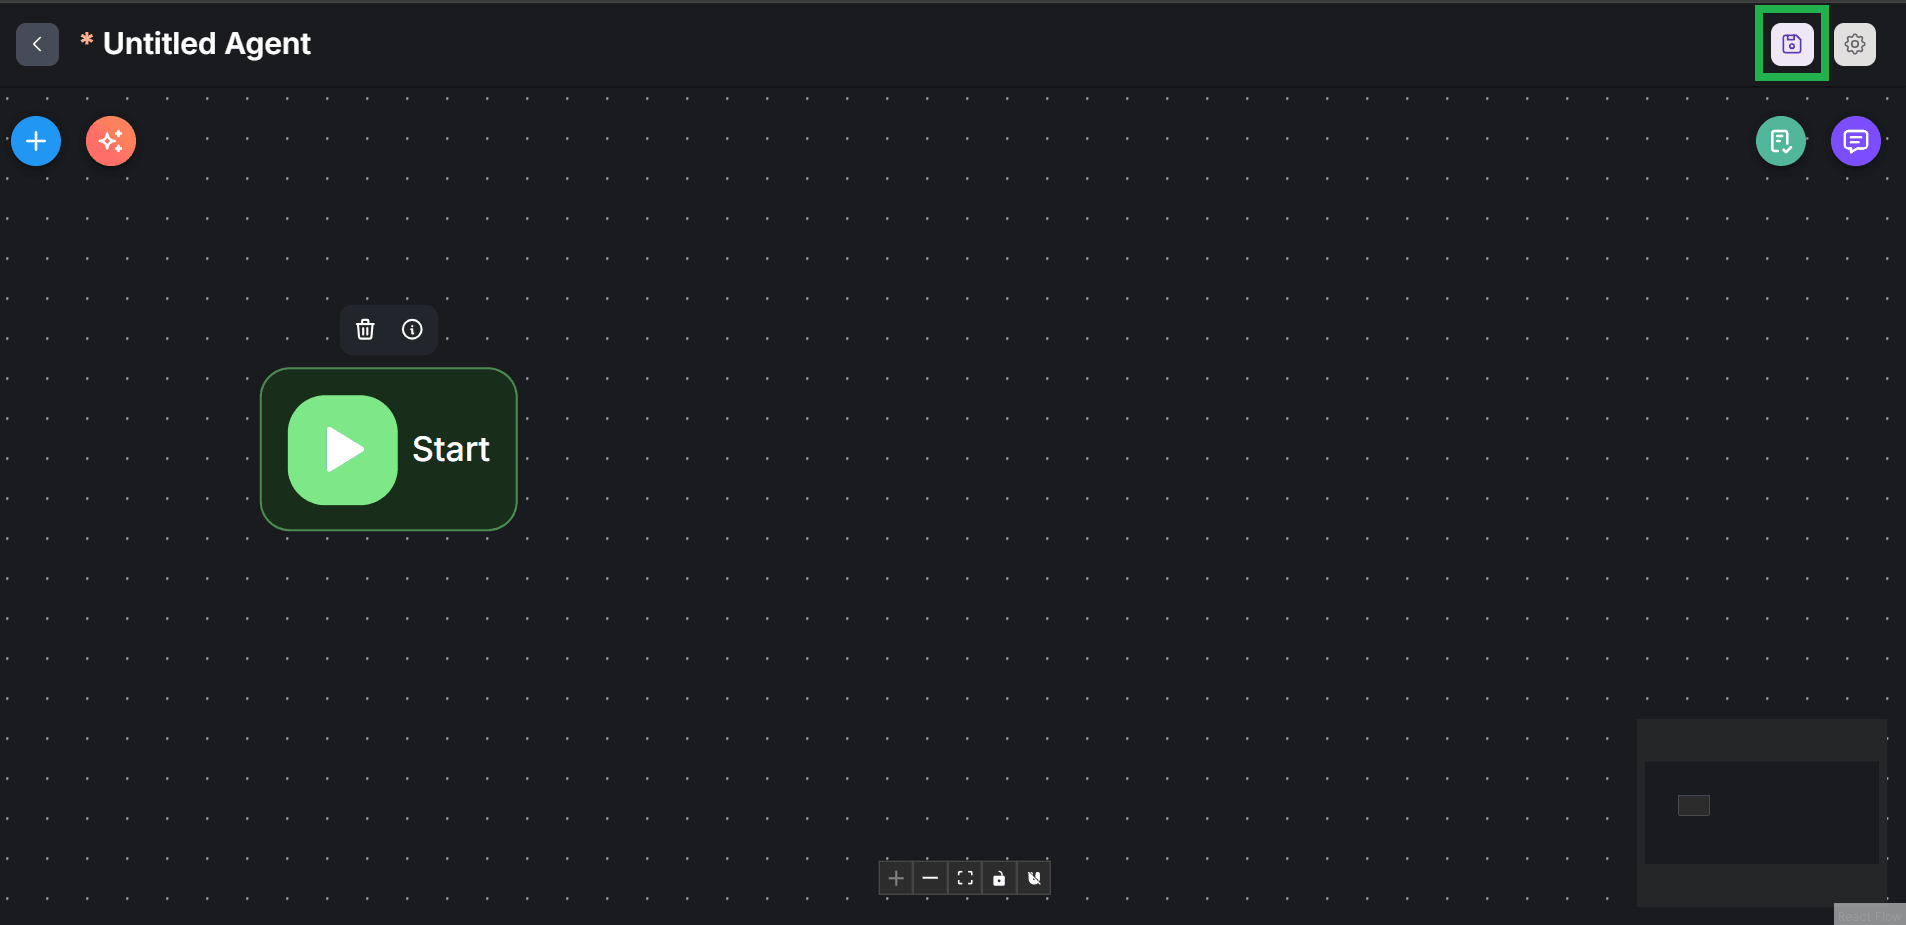
-
Enter a name for your new workflow and click
Save.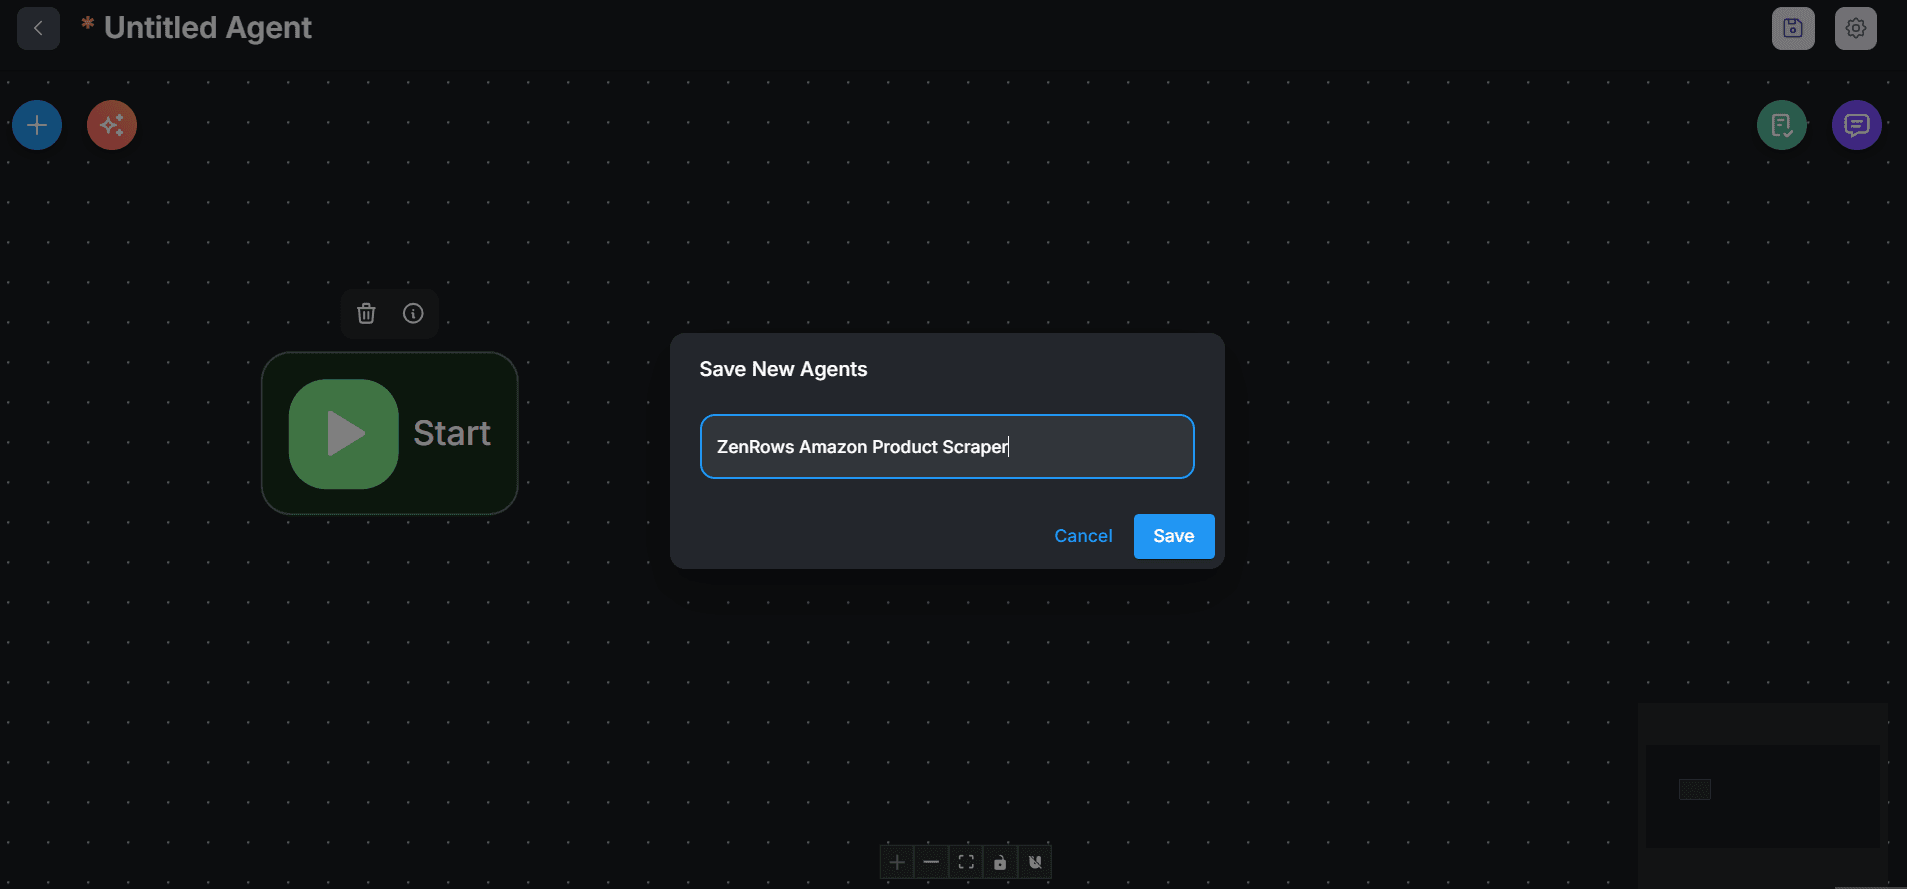
Step 4: Create a scraper flow with Zenrows
We’ll integrate the Zenrows API using an HTTP agent node, which enables you to send an API request via Flowise.-
Click the
+icon at the top left and search for “HTTP” using the search bar.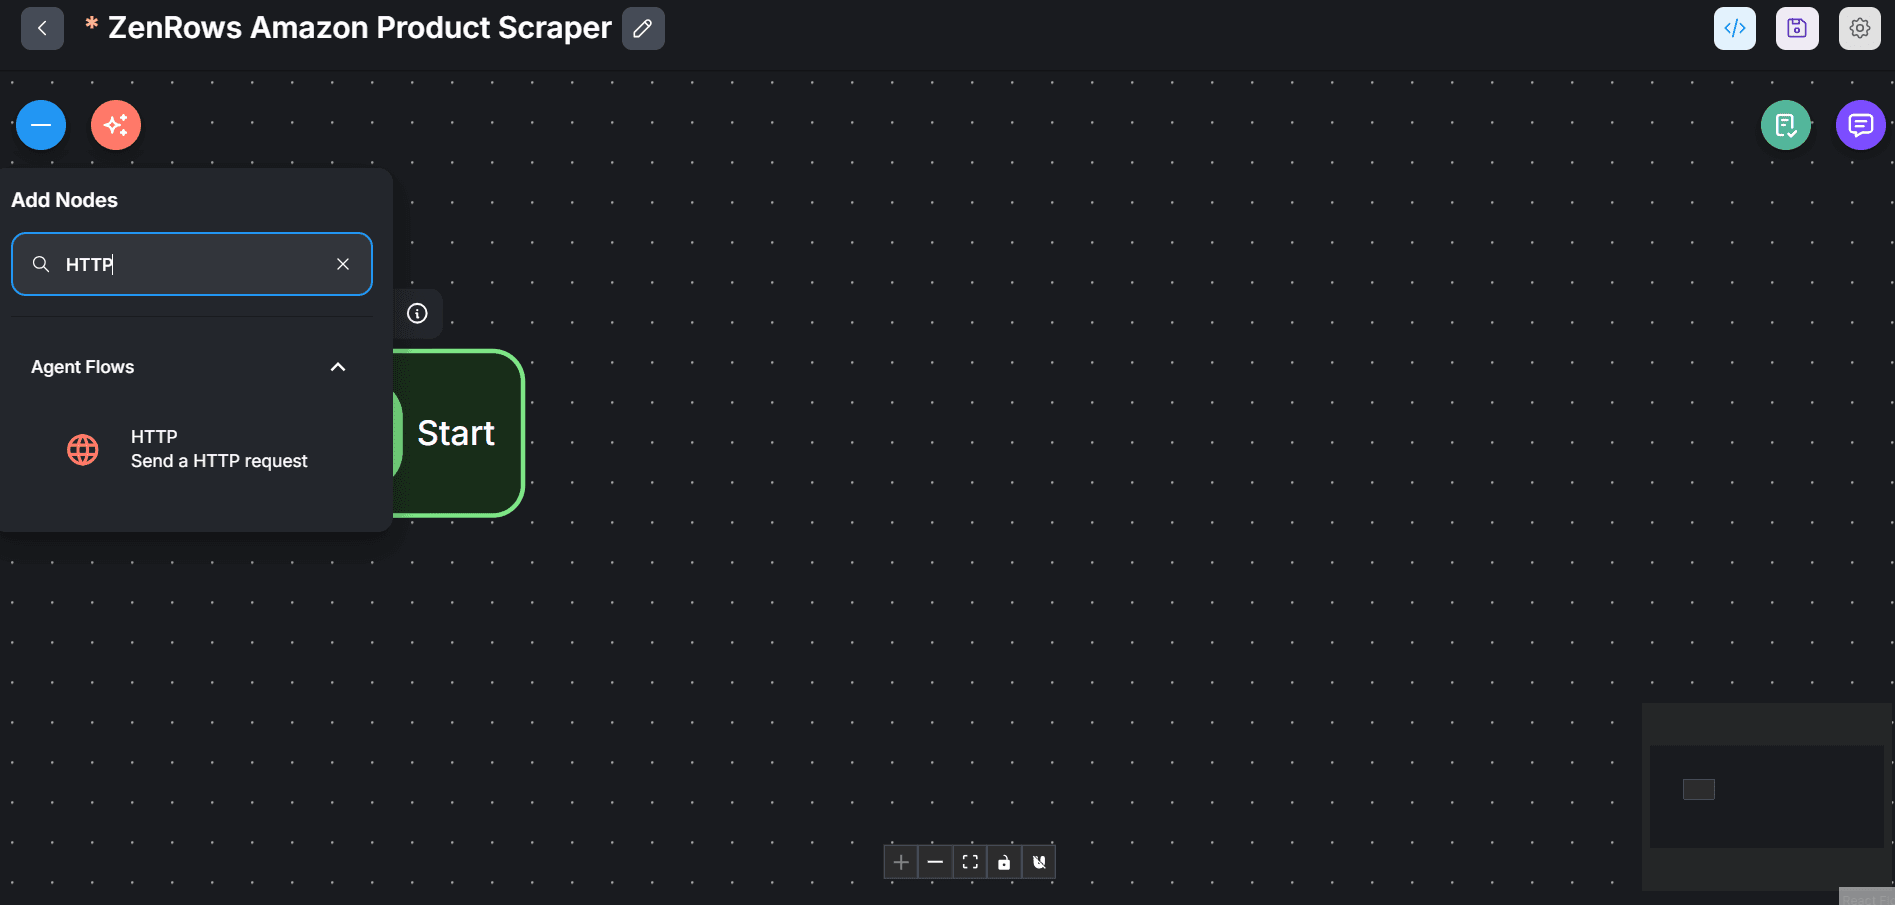
-
Drag and drop the HTTP node into your Canvas, placing it directly in front of the Start agent.
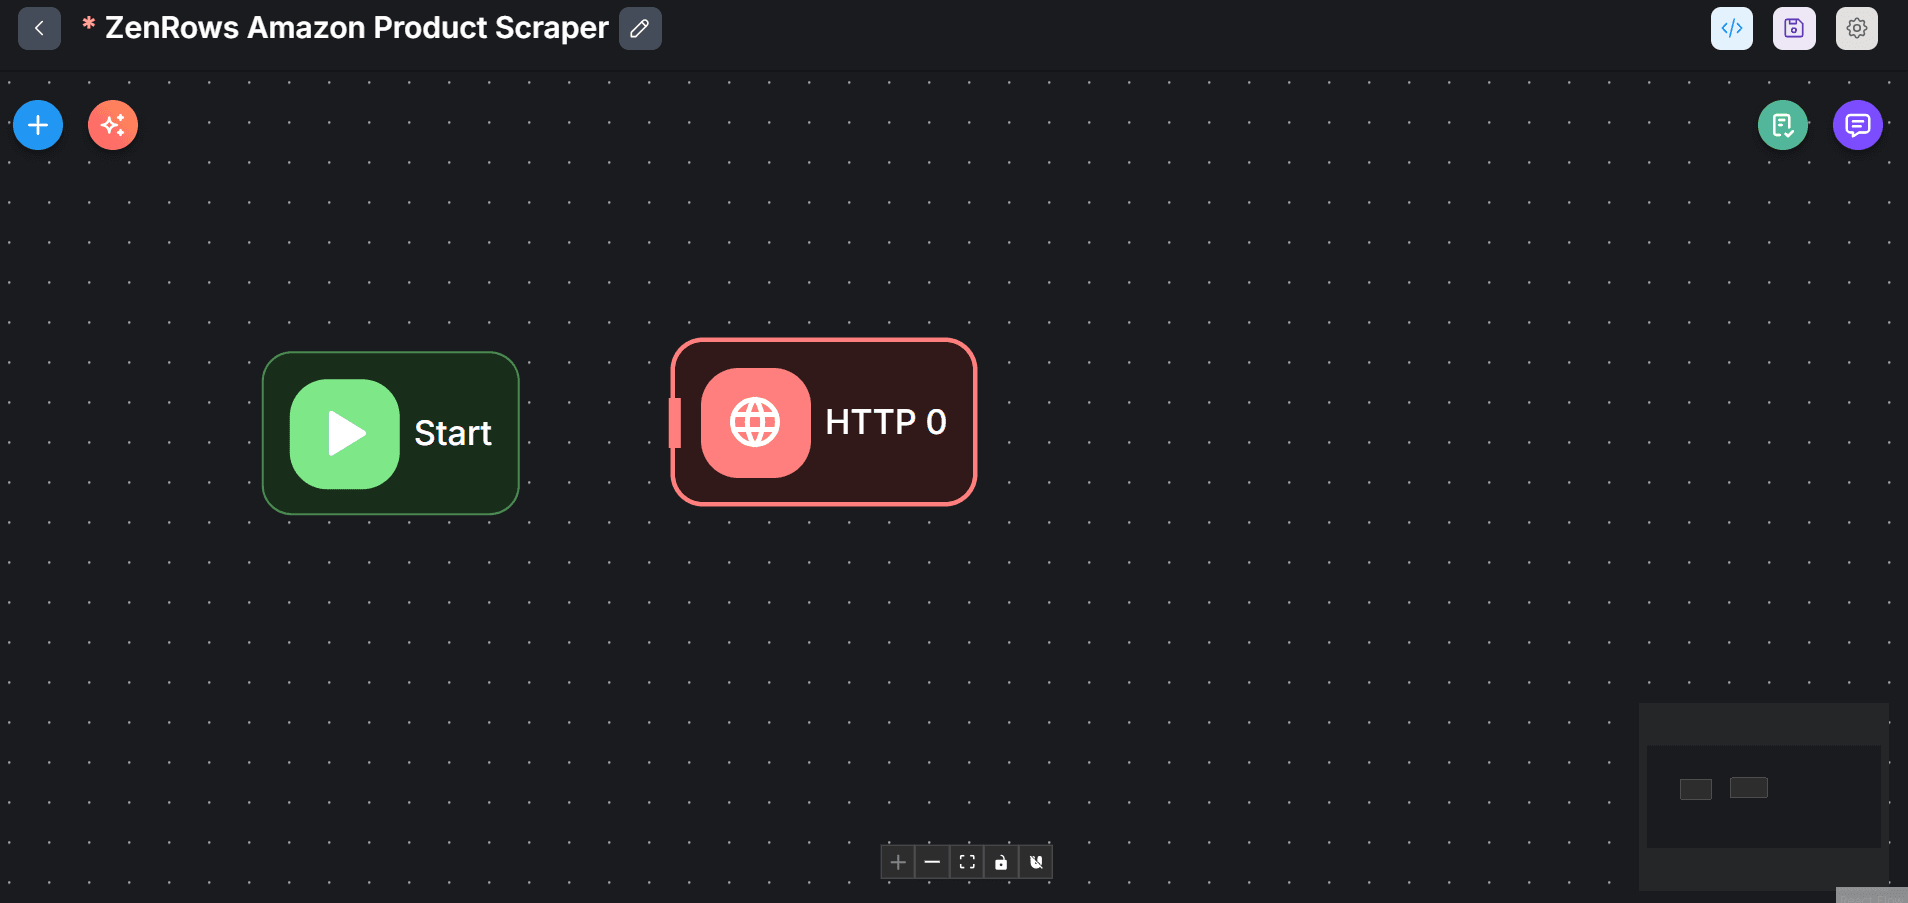
-
Link the agents by dragging a line from the Start node to connect with the HTTP agent node.
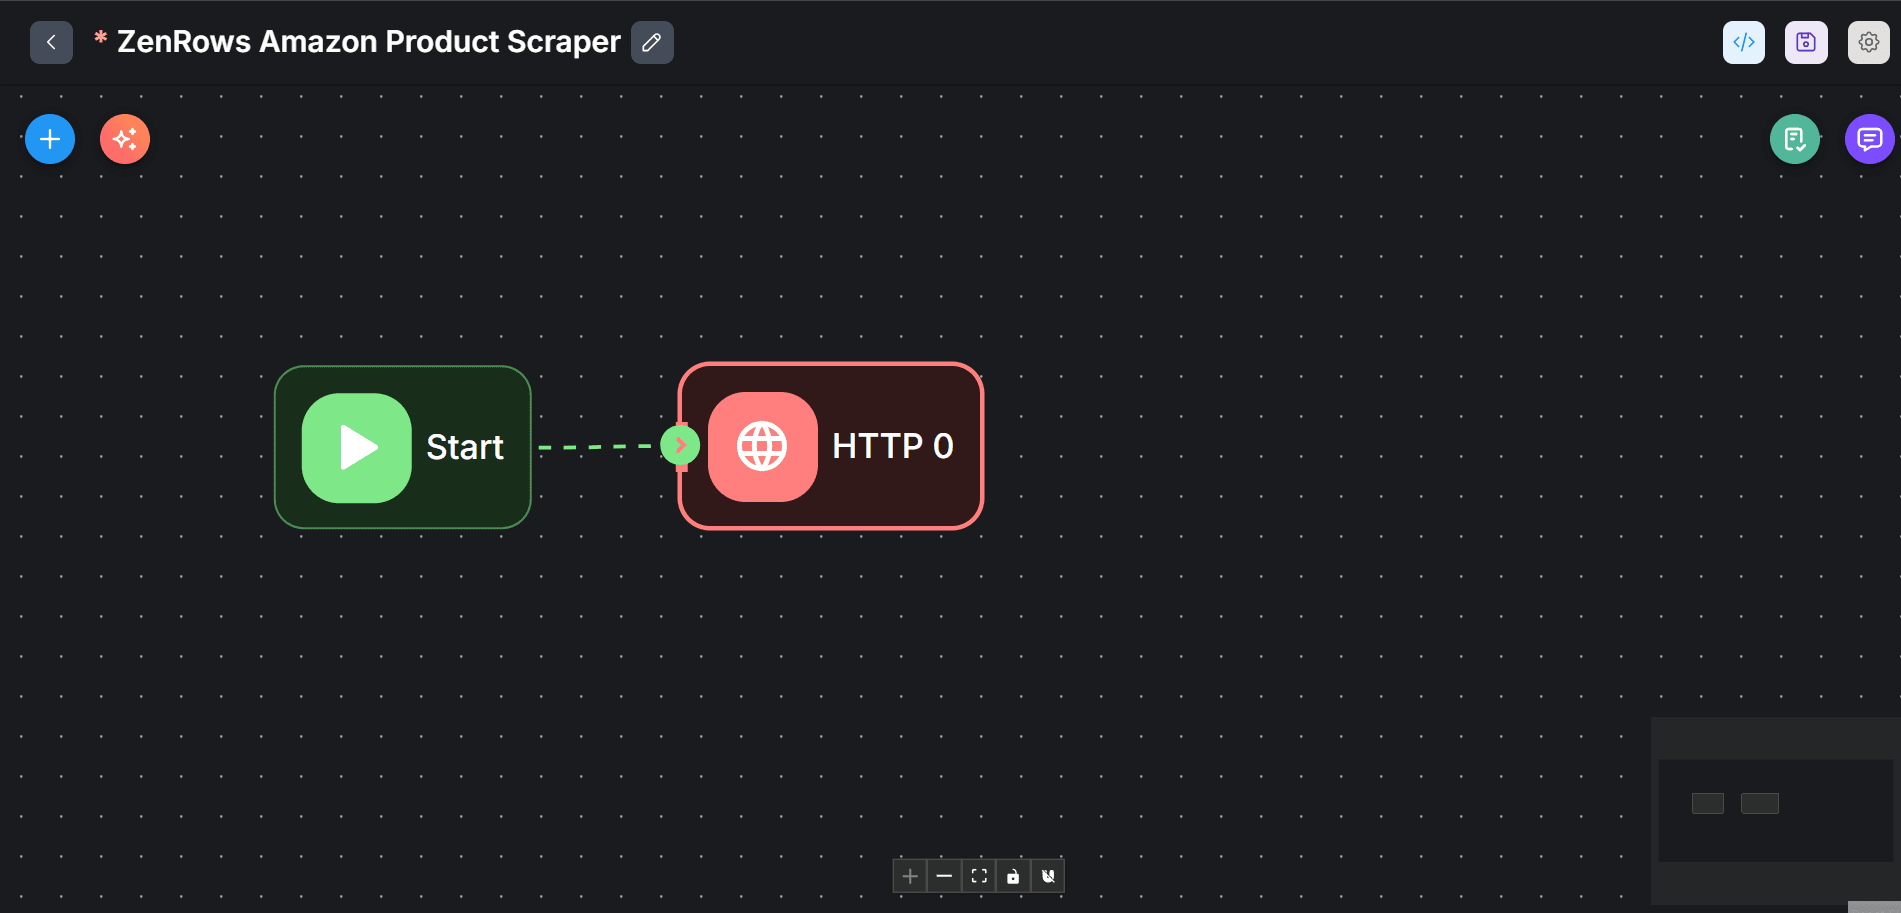
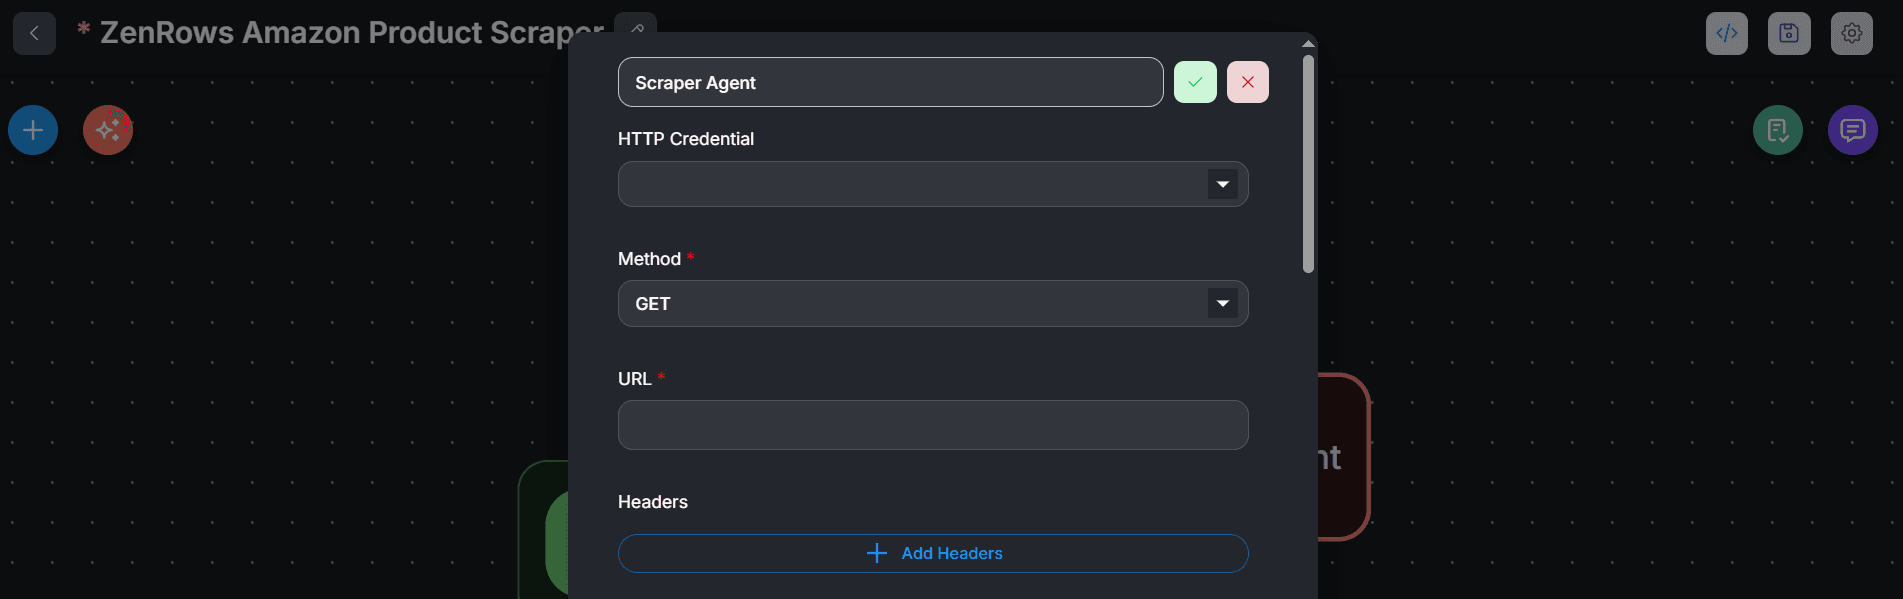
- Double-click the HTTP agent node.
-
Click the edit icon at the top of the modal to change the agent’s name. Then, press Enter on your keyboard.
-
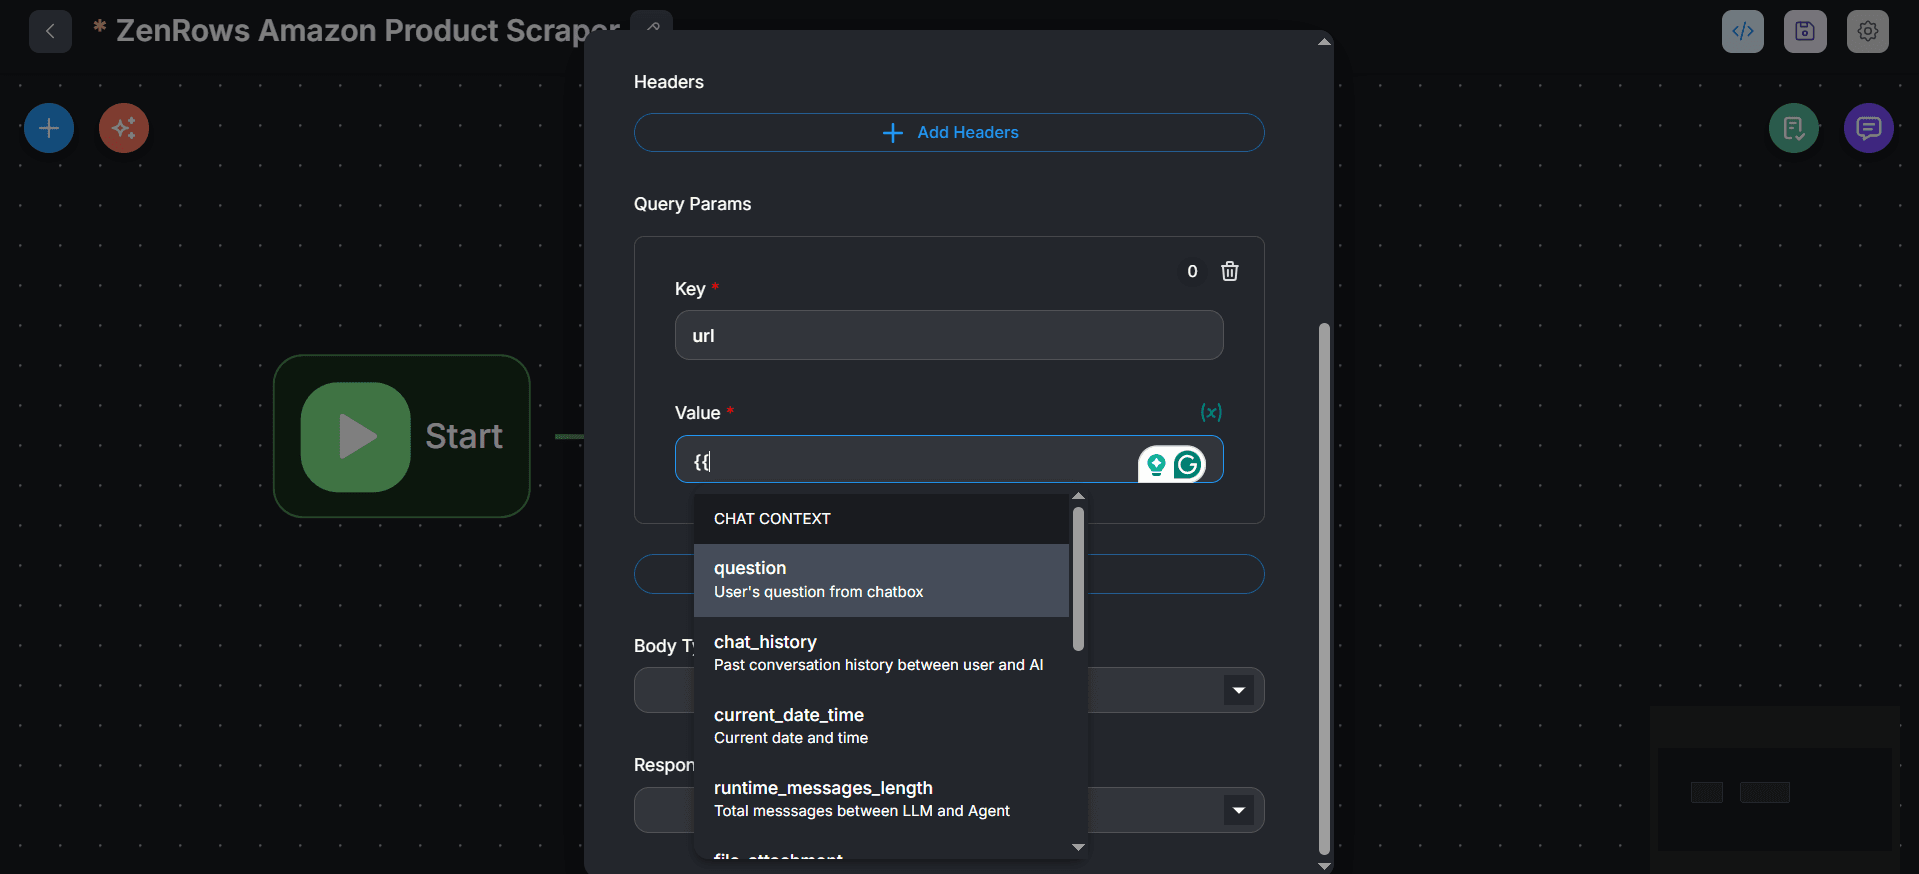
Click
+ Add Query Paramsto set the target URL parameter. We’ll retrieve this URL dynamically from the chat box:- Type
urlin the Key field. - Type double braces (
{{) in the Value field. This loads dynamic input options. - Select question from the options to load the URL from the chat box.
- Type
-
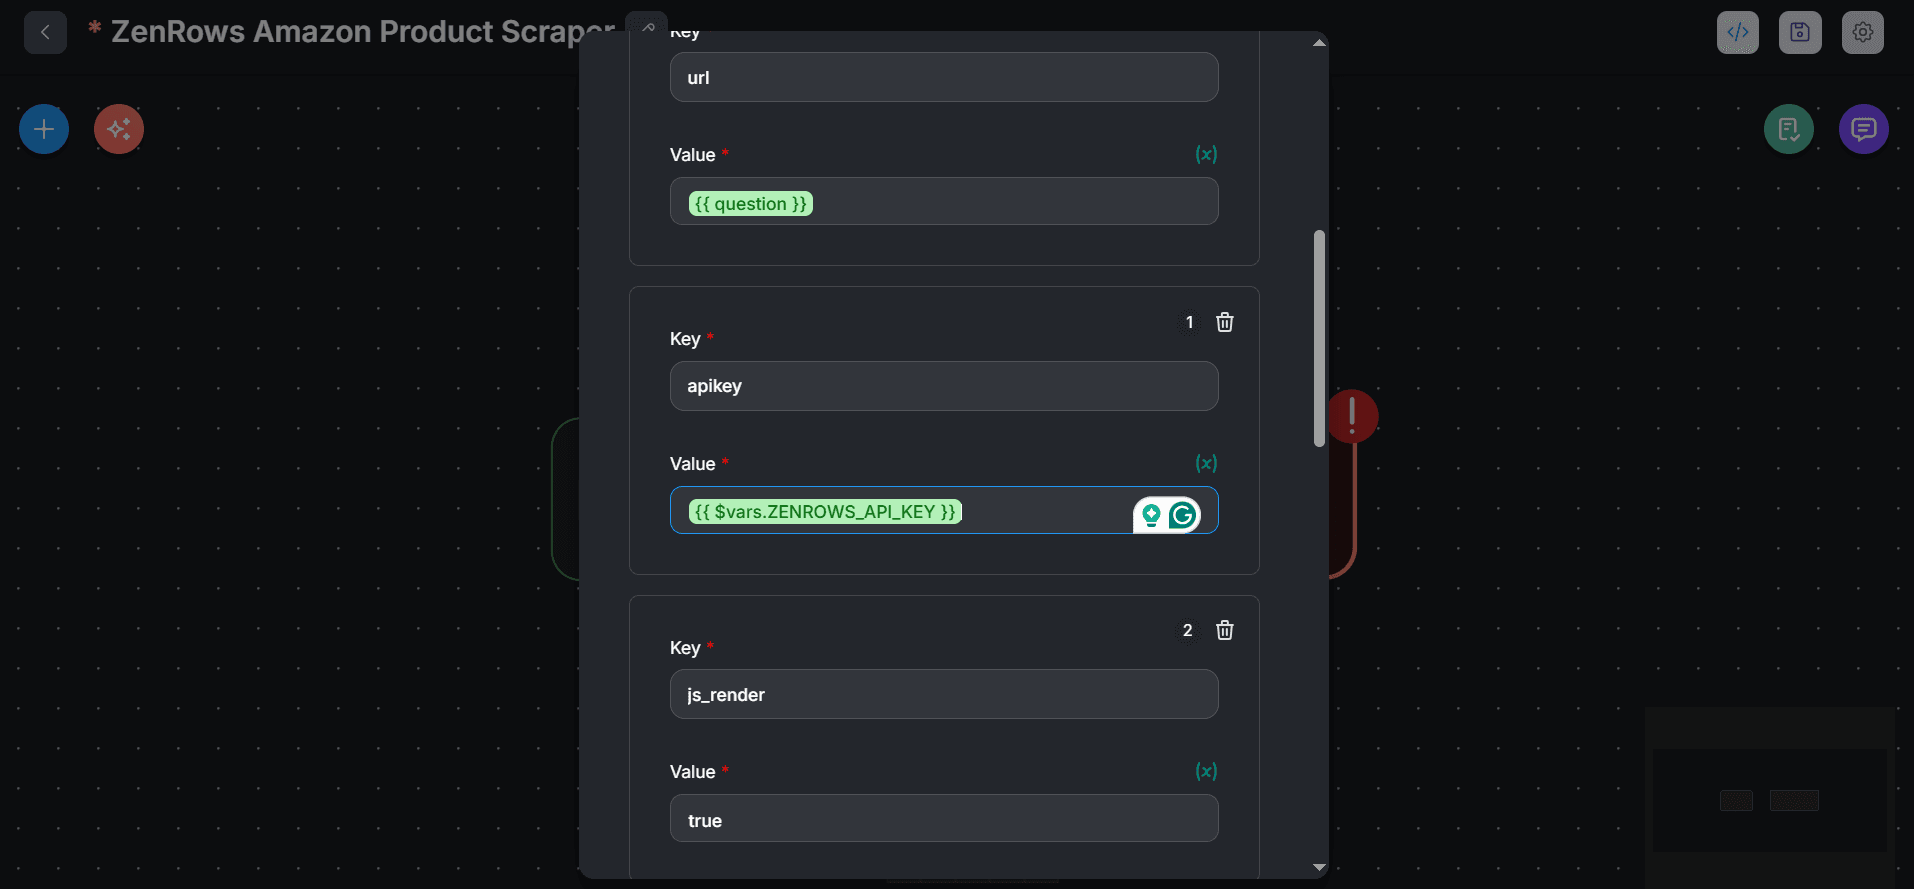
Similarly, for the Zenrows API key, click
+ Add Query Paramsand typeapikeyin the Key field. Type{{inside the Value and select$vars.ZENROWS_API_KEY. -
Click
+ Add Query Paramsrepeatedly to add each of the following Zenrows parameters in order:js_render=truepremium_proxy=truewait=2500css_extractor=original_status=true
-
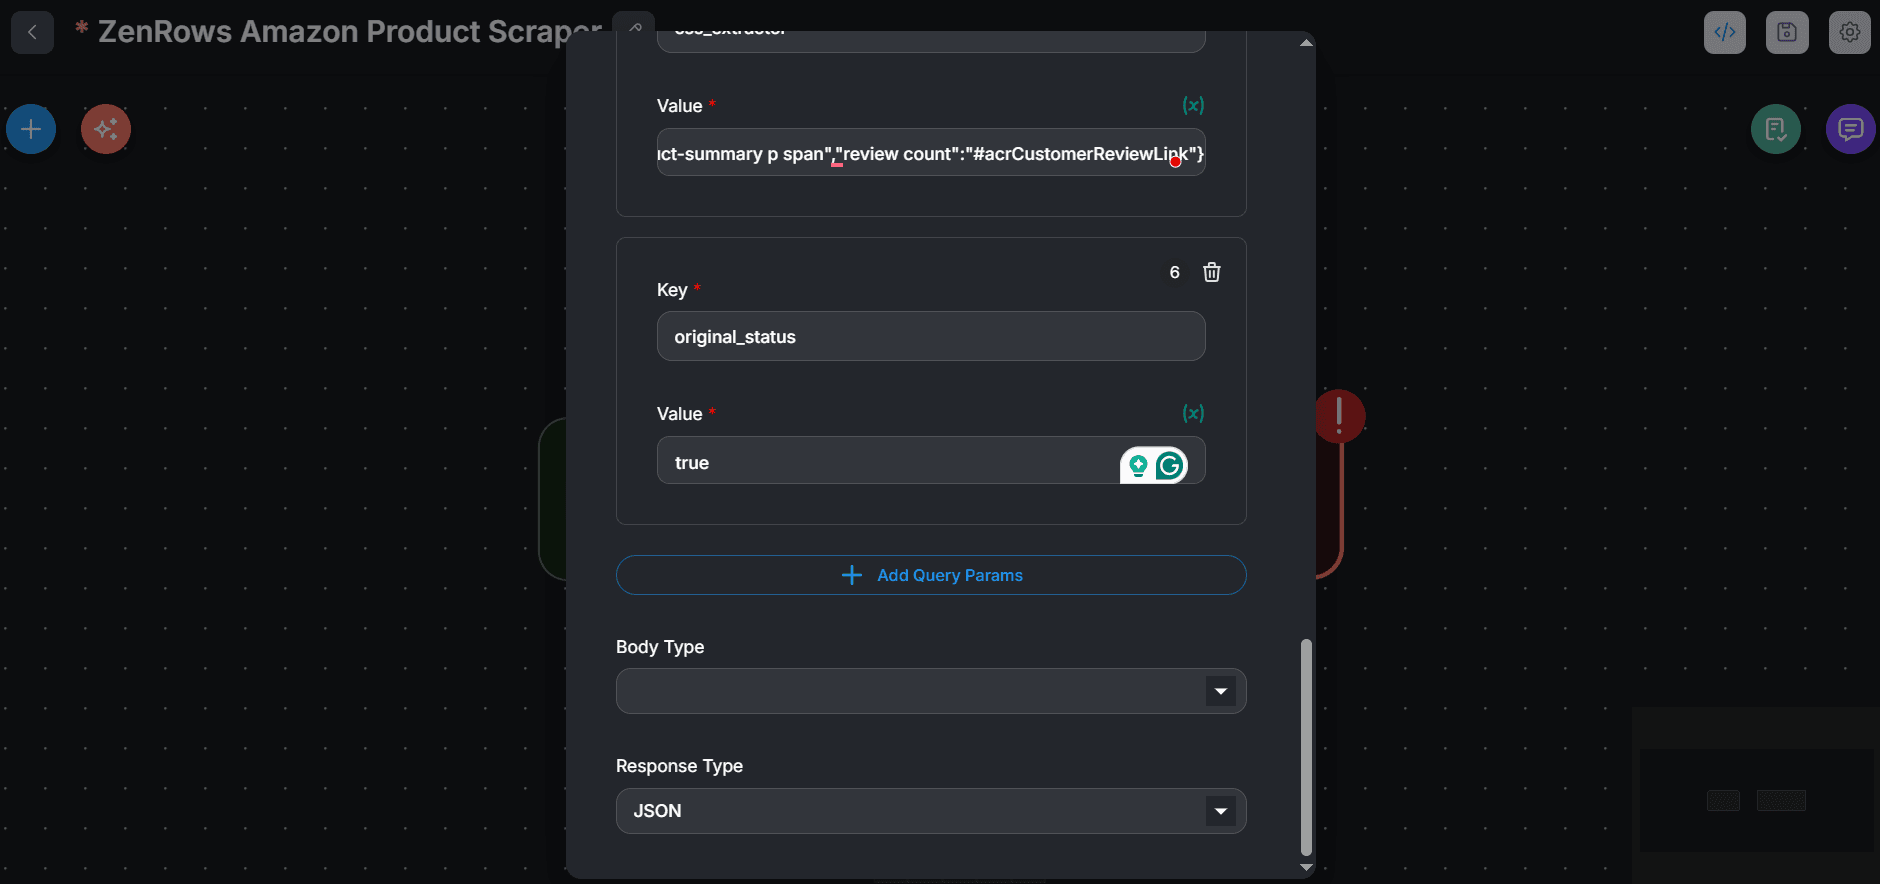
Add your CSS selectors as an array in the
css_extractorvalue: We’ll use the followingcss_extractorfor this tutorial: -
Under Response Type, select Text.
-
Click on the
Flowise Canvas. Then, click theValidate Nodesicon at the top right and selectValidate Nodesto confirm that your setup is correct.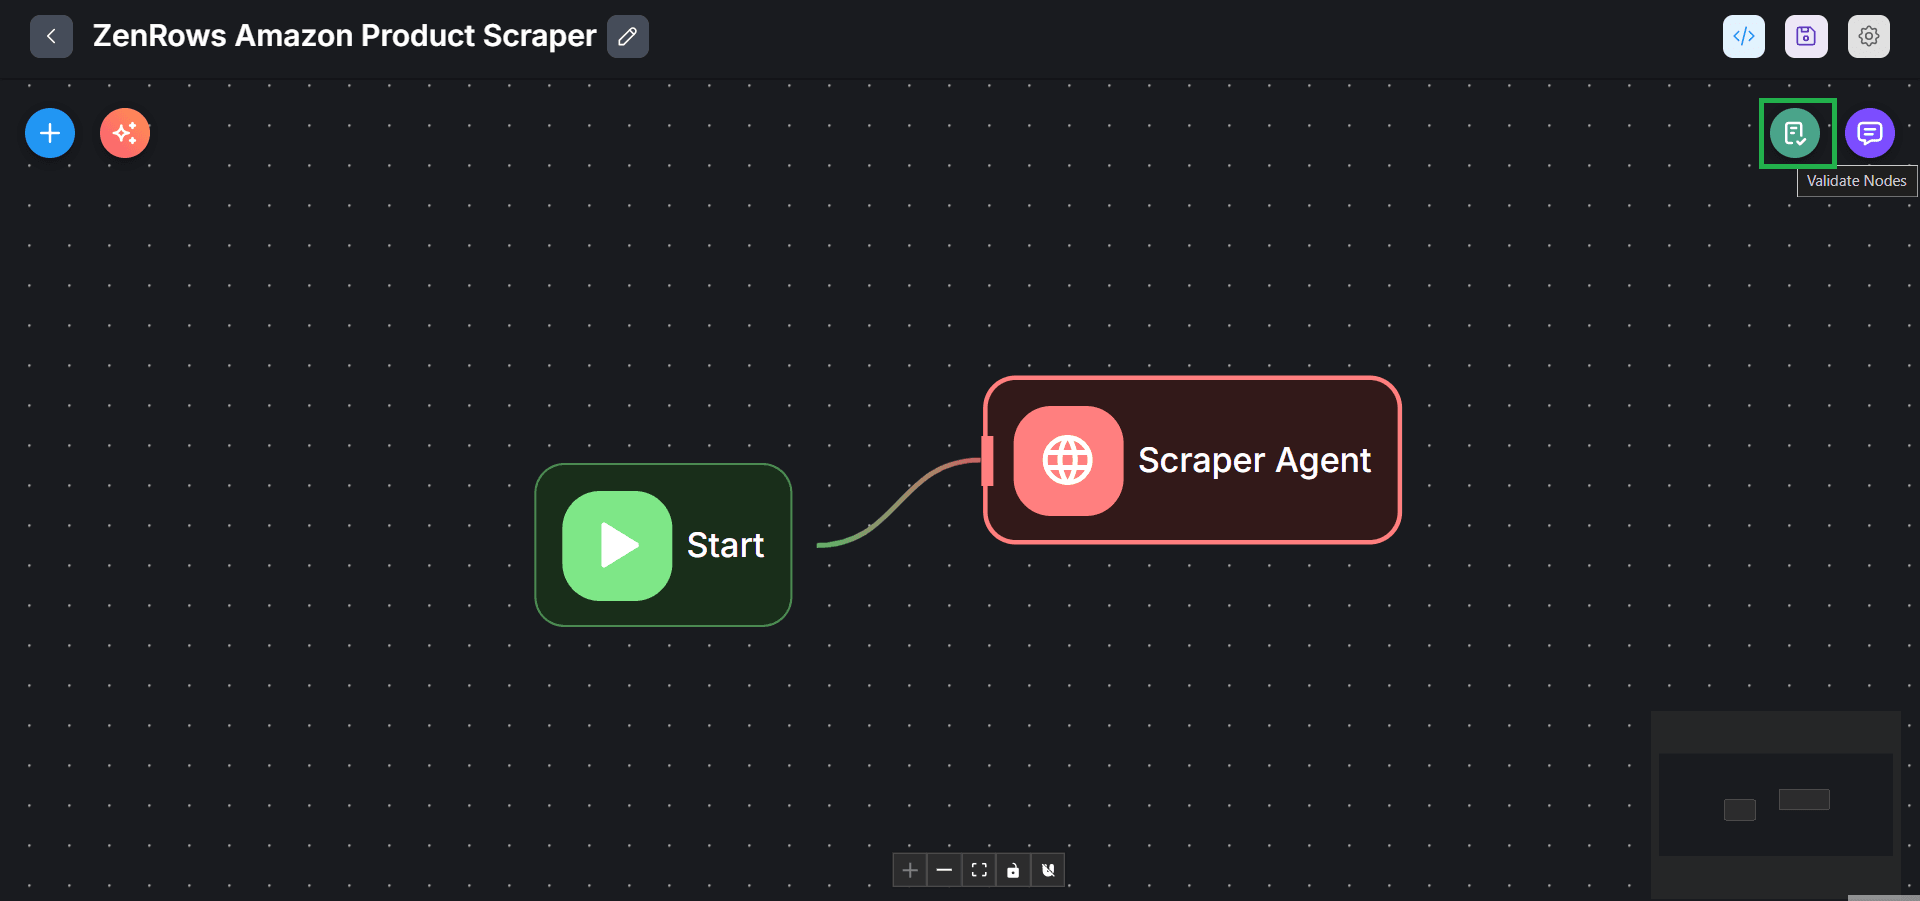
-
Finally, click the
saveicon at the top right to save your changes.
Step 5: Run the flow
- Click the chat icon at the top right.
- Type an Amazon product page URL in the box and press Enter to send your request.
-
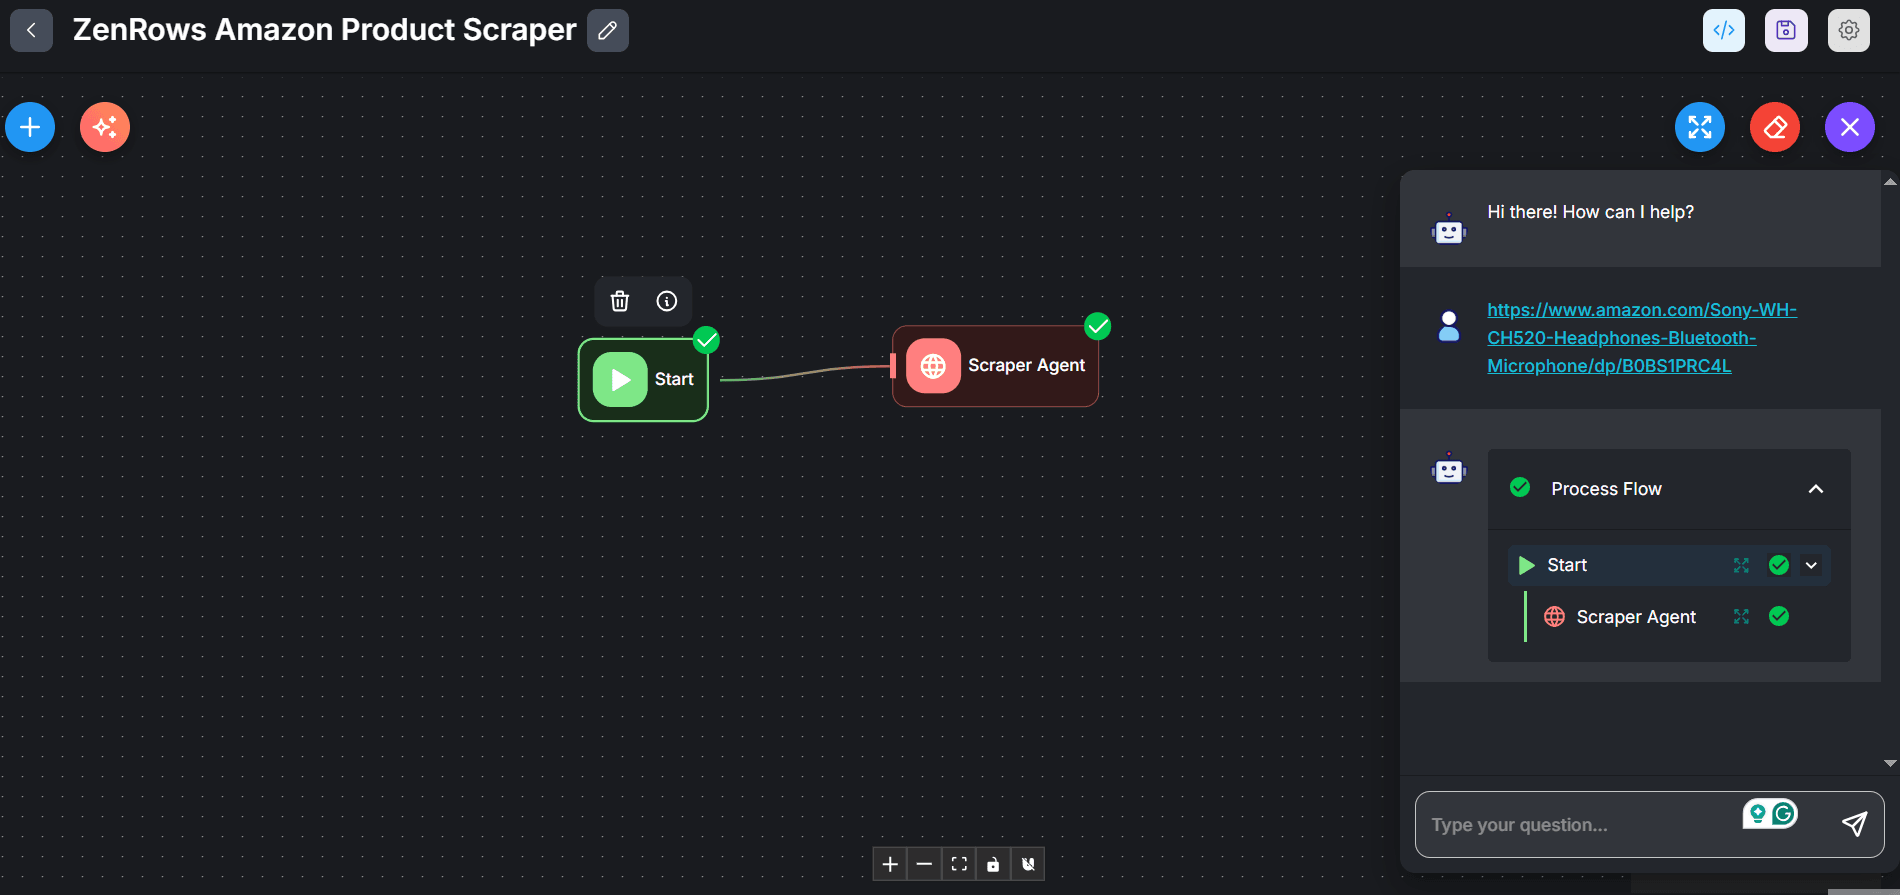
Click the
Process Flow bannerin the chat box. -
Click the expansion icon next to Scraper Agent.
-
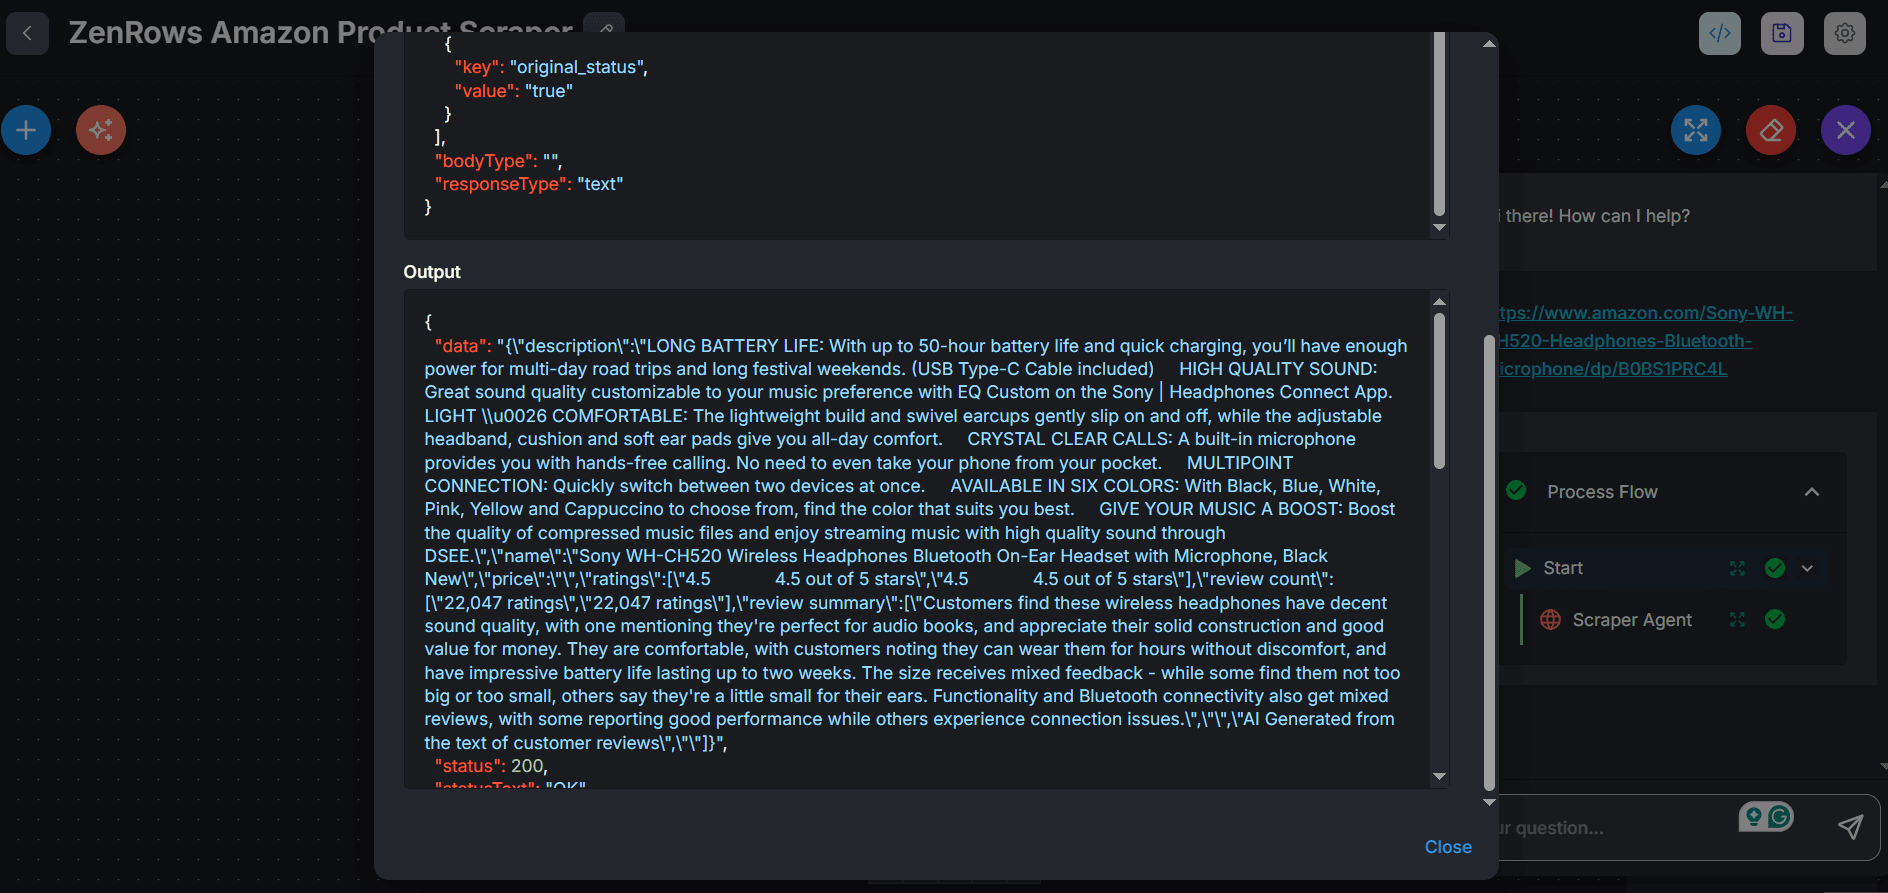
You’ll see the following response page, showing the scraped data:
Step 6: Integrate an LLM flow
-
Click the
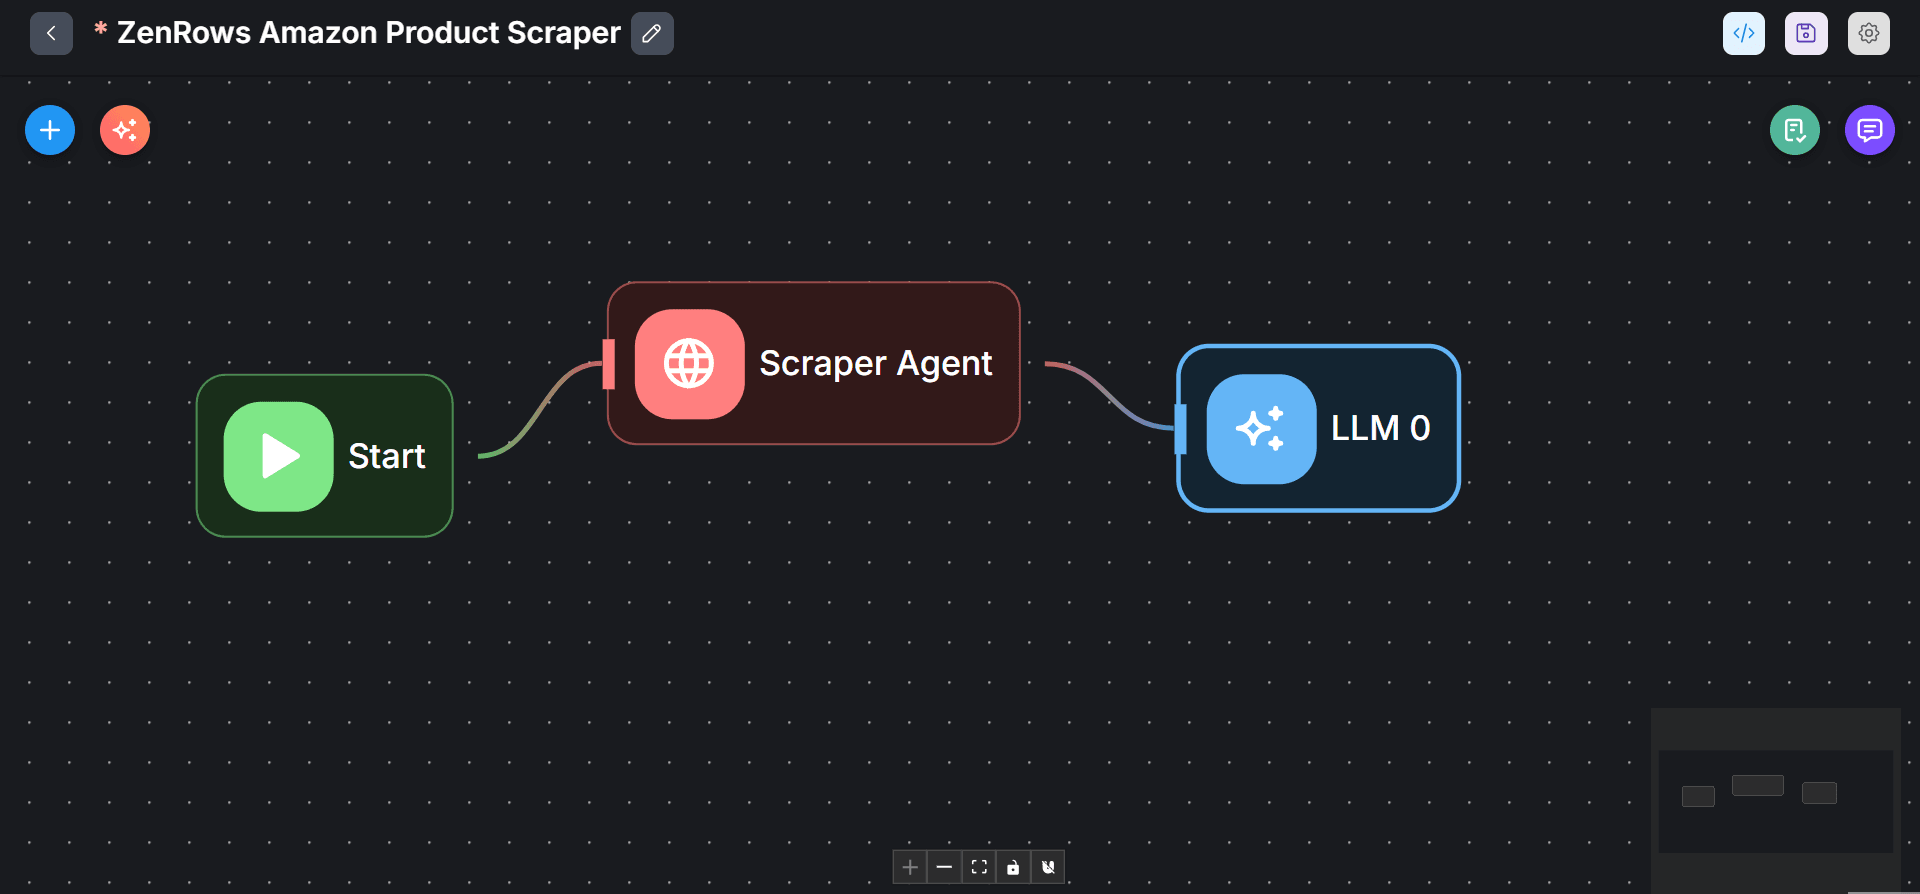
+icon at the top left. Search LLM. Then, drag and drop it in the canvas next to the Scraper Agent. -
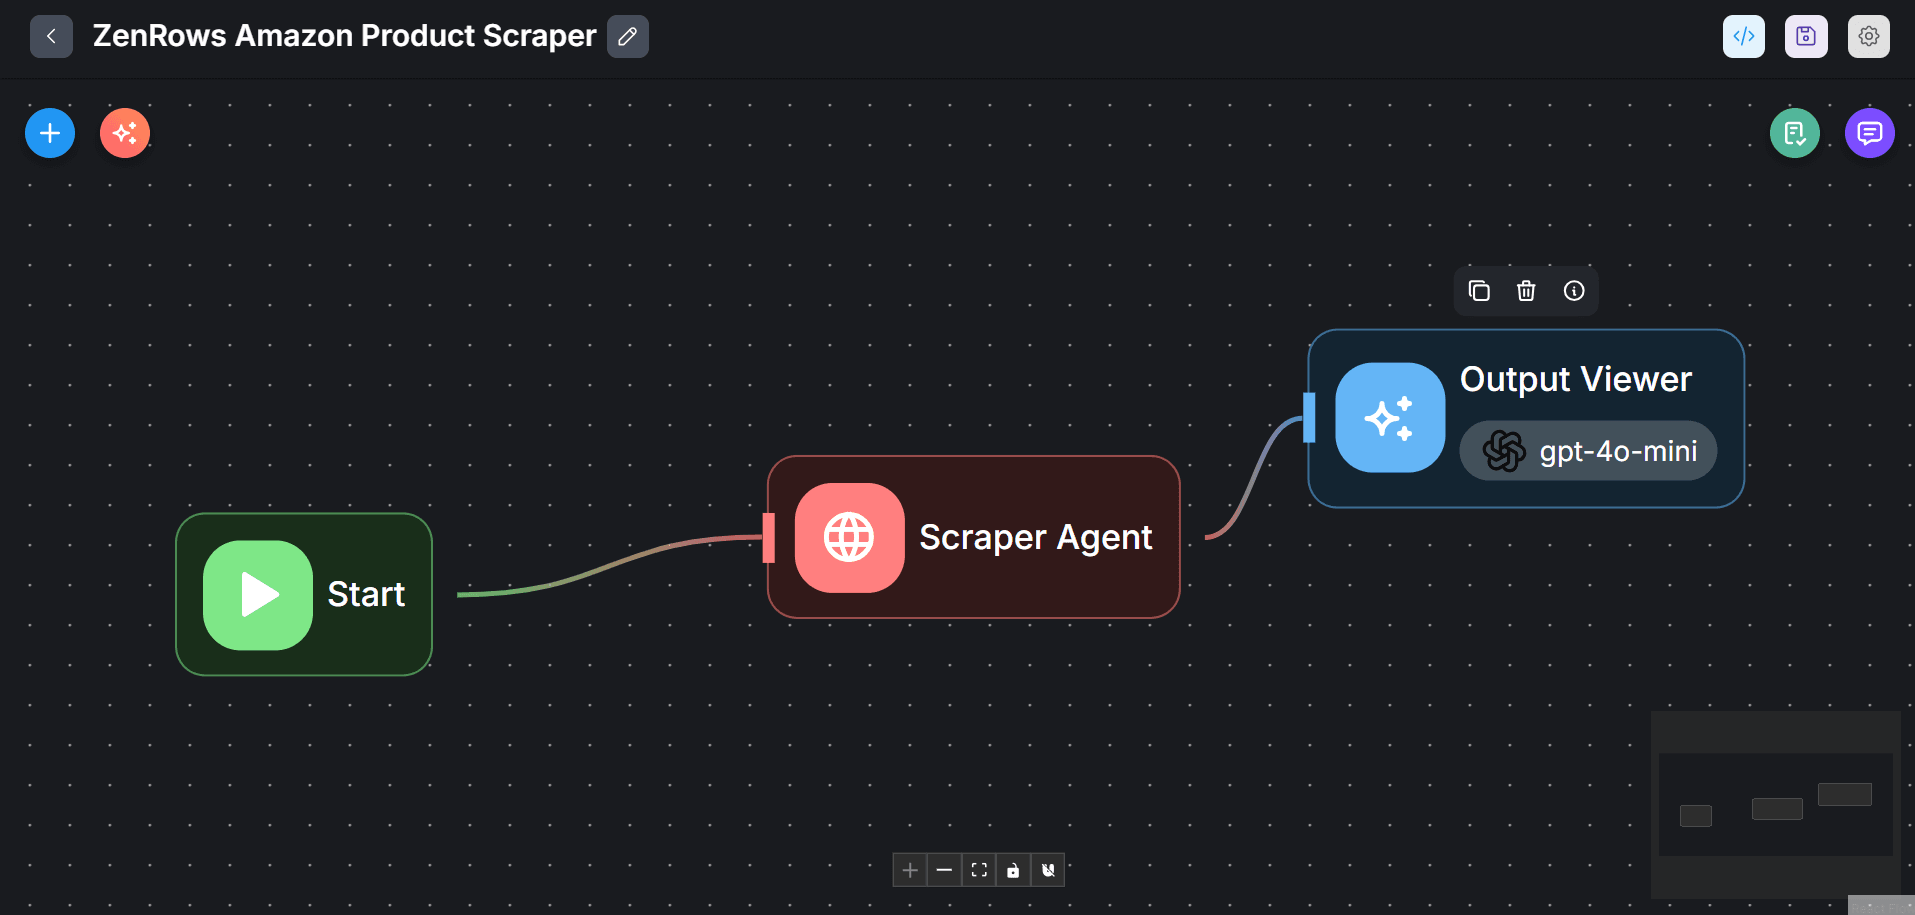
Link the Scraper Agent to the LLM node.
-
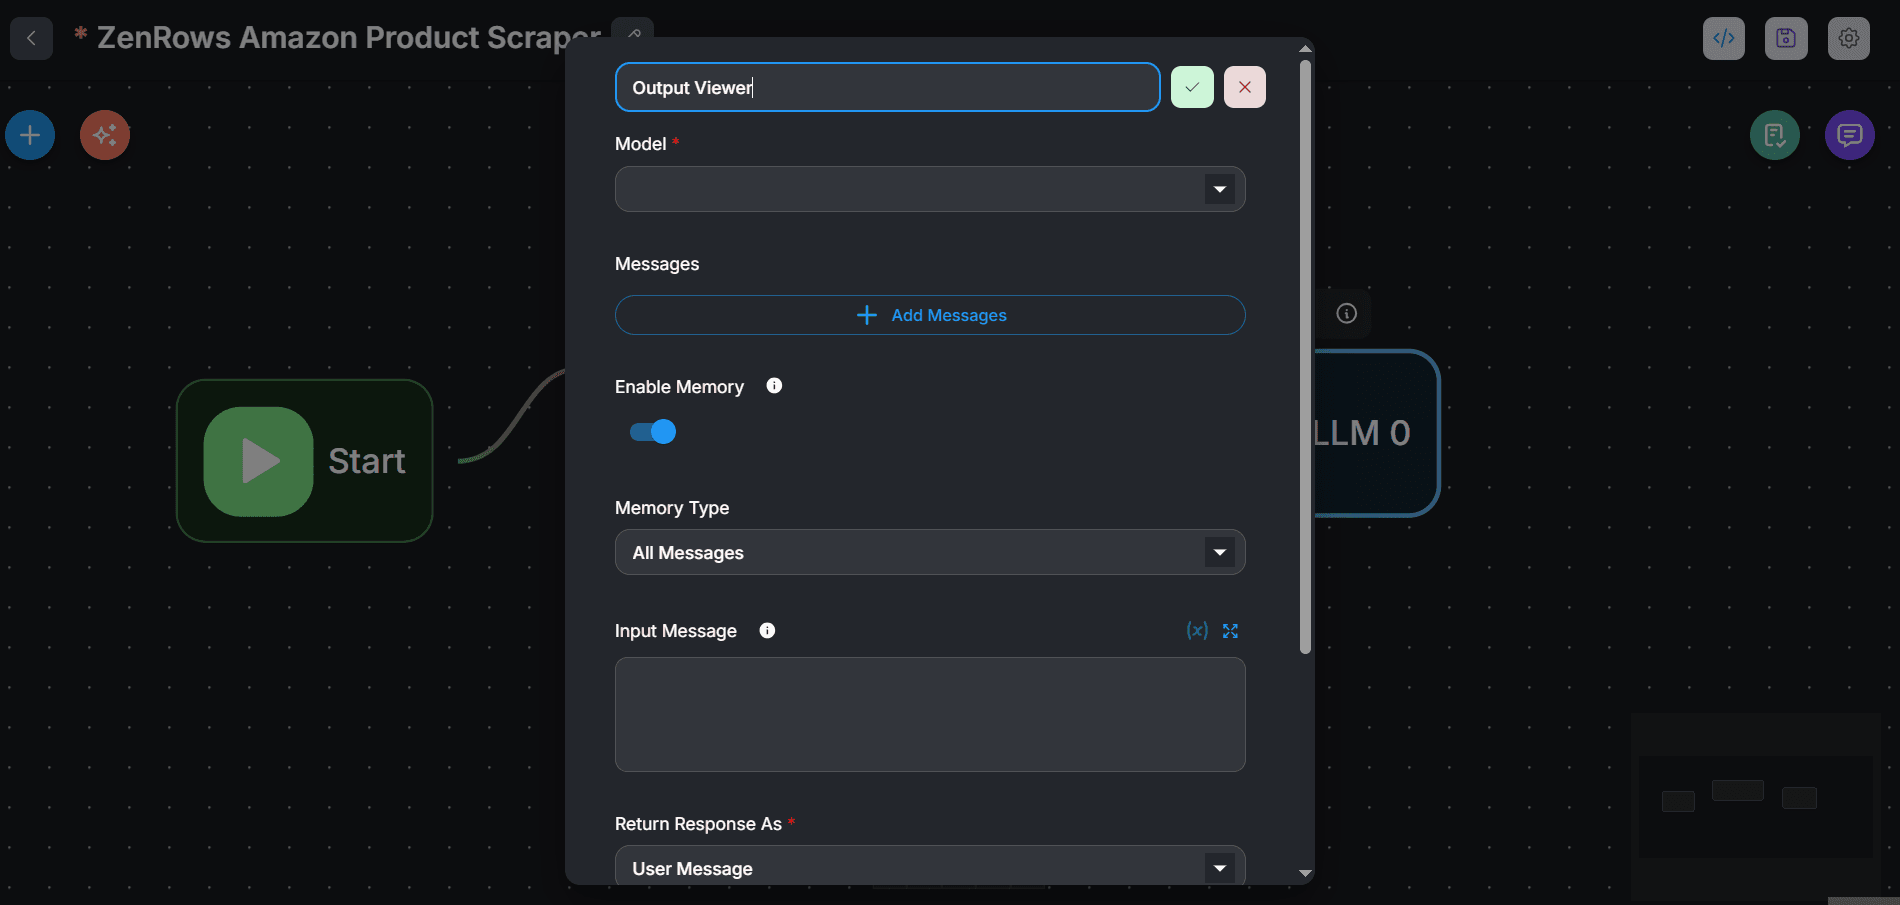
Double-click the LLM agent and rename it.
-
Under Model, search and select
ChatOpenAI. -
Click
ChatOpenAIParameters:- Click on
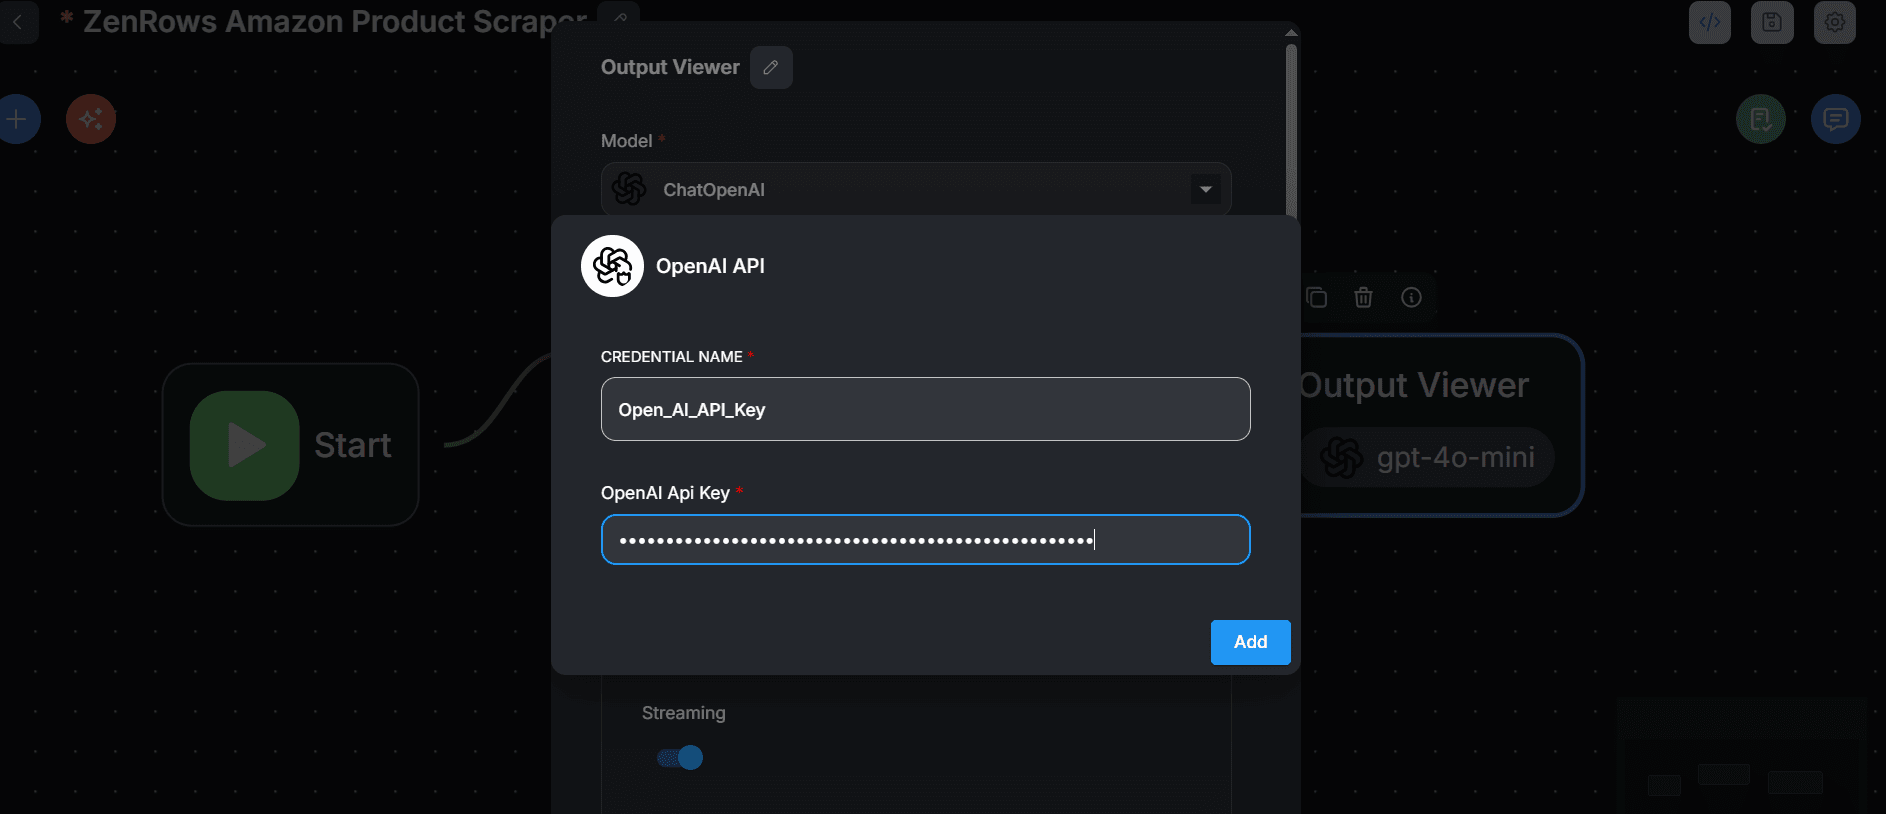
Connect Credentials, then onCreate Newand set up your OpenAI API key and clickAdd.
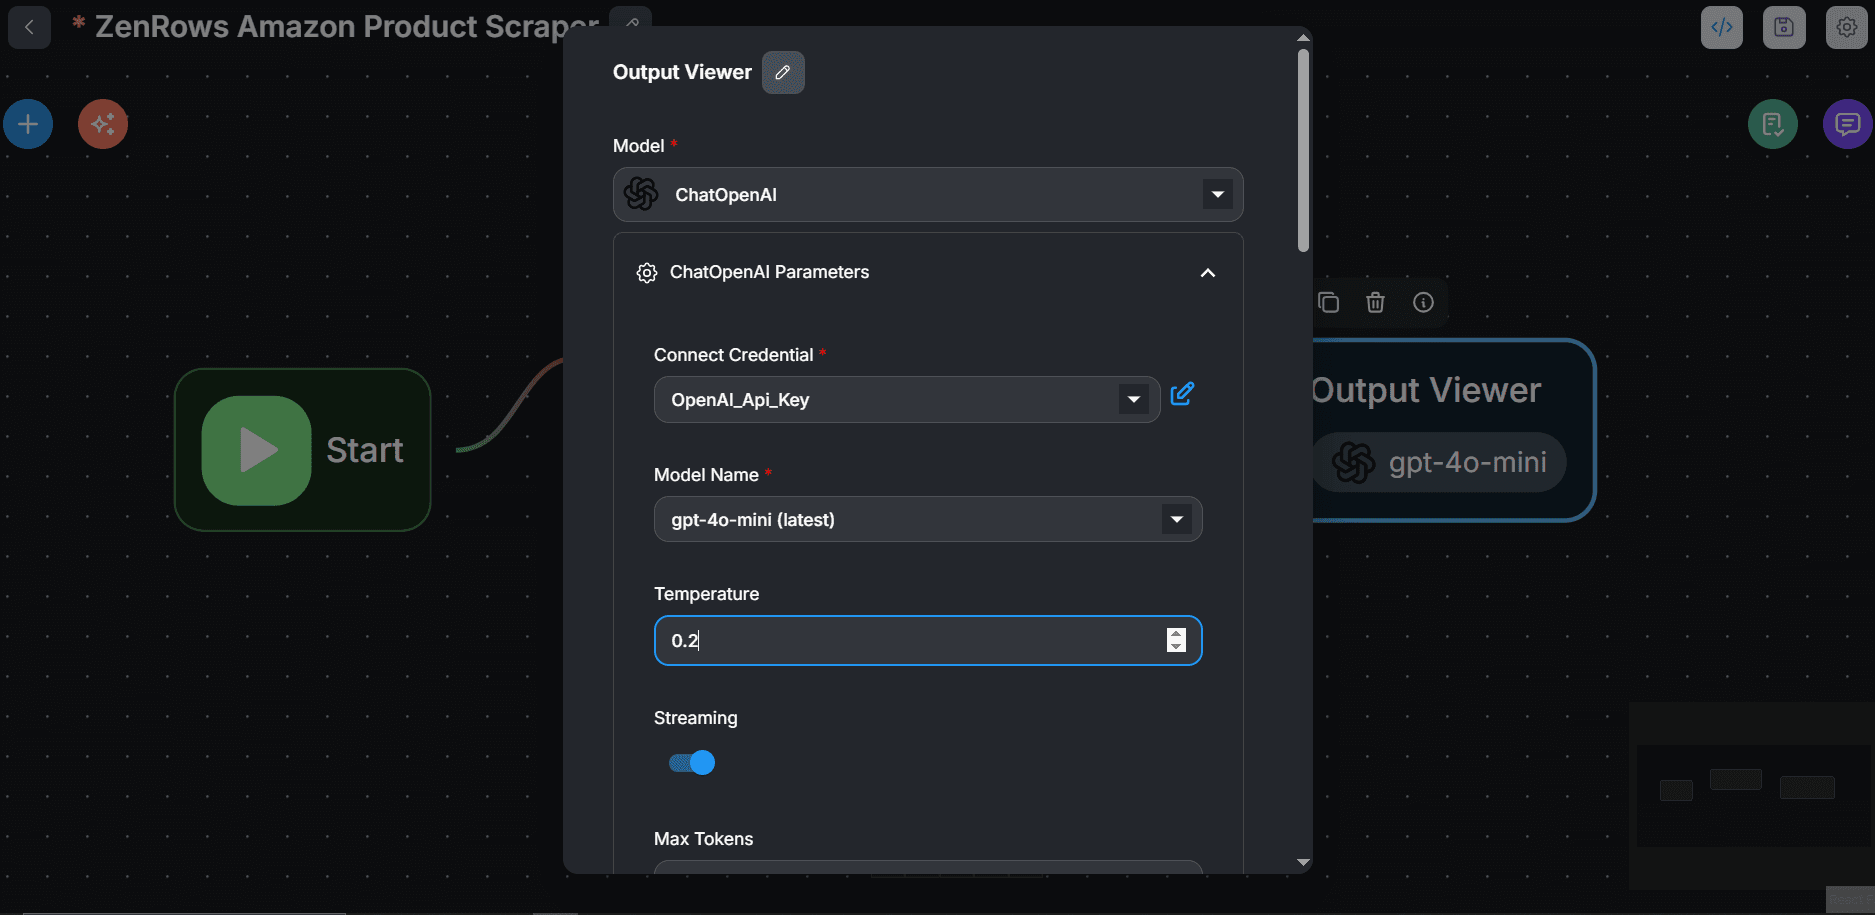
- Select your desired model, temperature (preferably, 0.1 or 0.2 for increased accuracy), and other parameters.
- Click on
-
Click
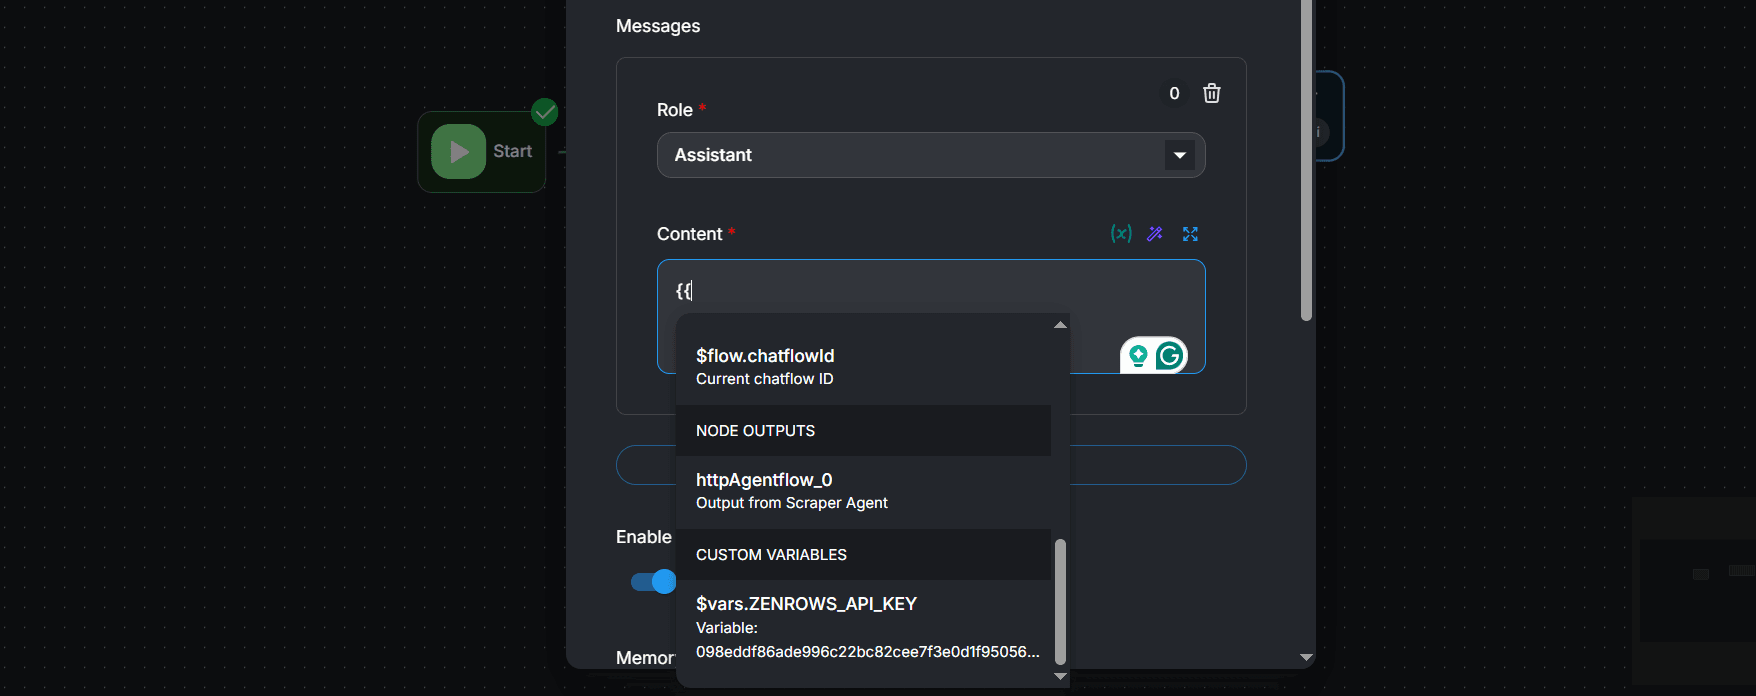
+ Add Messages:- Under Role, select
Assistant. - Type
{{inside the Content field and selecthttpAgentflow_0.
- Under Role, select
-
Toggle on
Enable Memory.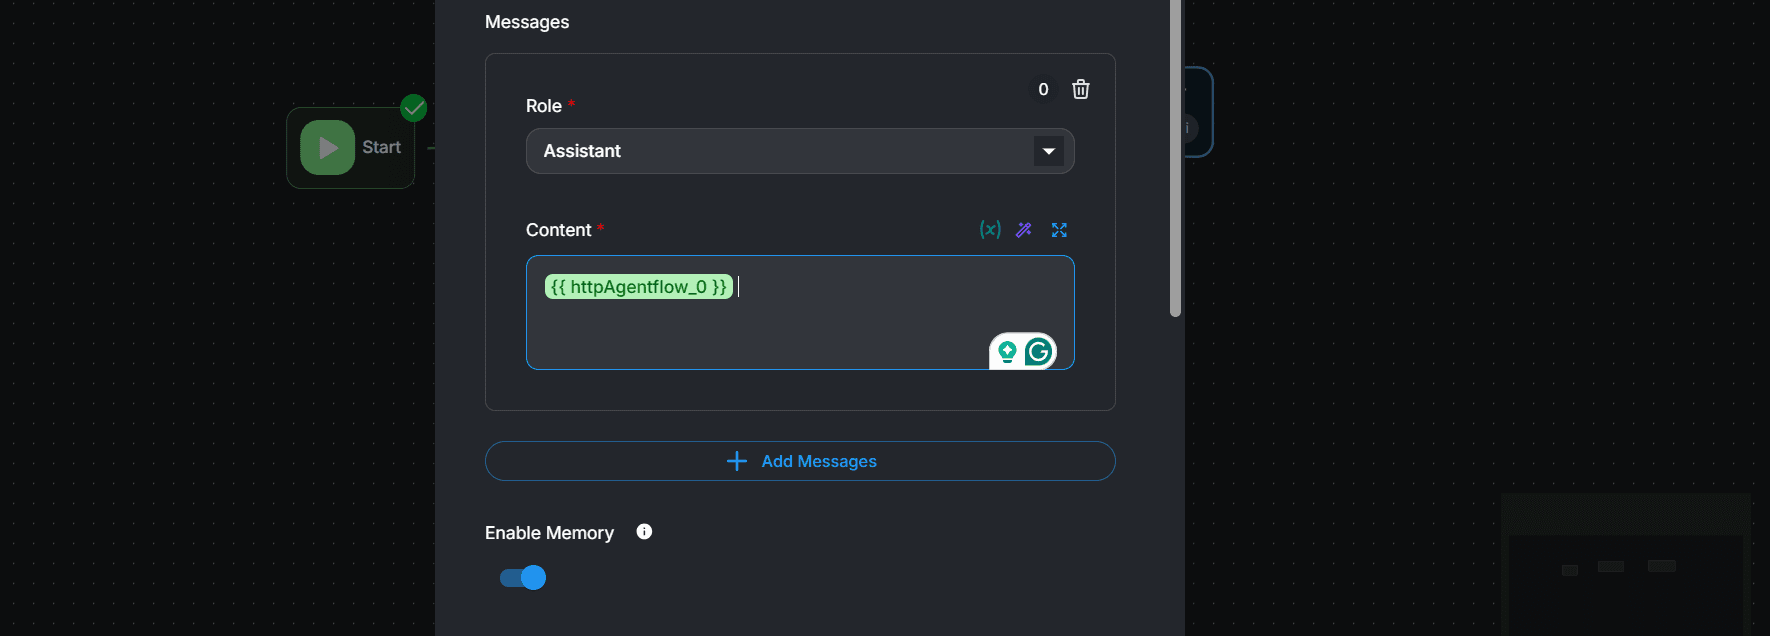
-
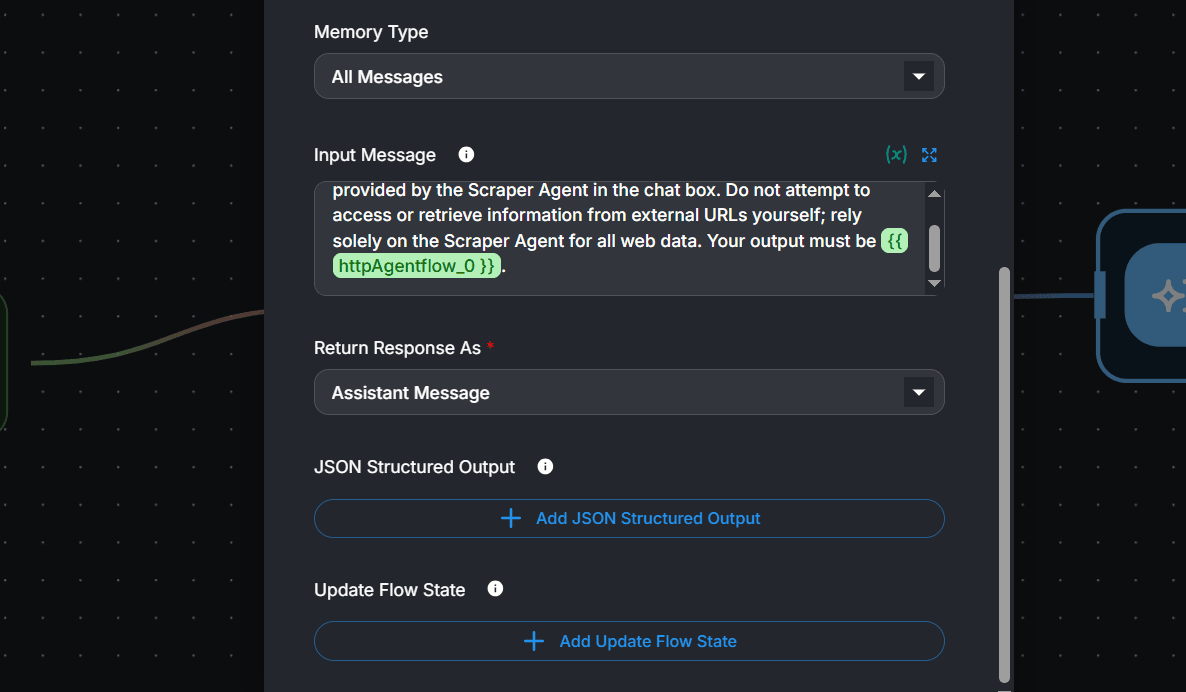
Type the following prompt in the Input Message field. We’ve instructed the LLM to only show
{{ httpAgentflow_0 }}as the output and not attempt to visit any URL provided in the chat: -
Set the Return Response As field to Assistant Message. This allows the chat model to return the Scraper Agent’s output in its response.
-
Click anywhere in the canvas. Then click the save icon at the top right.
-
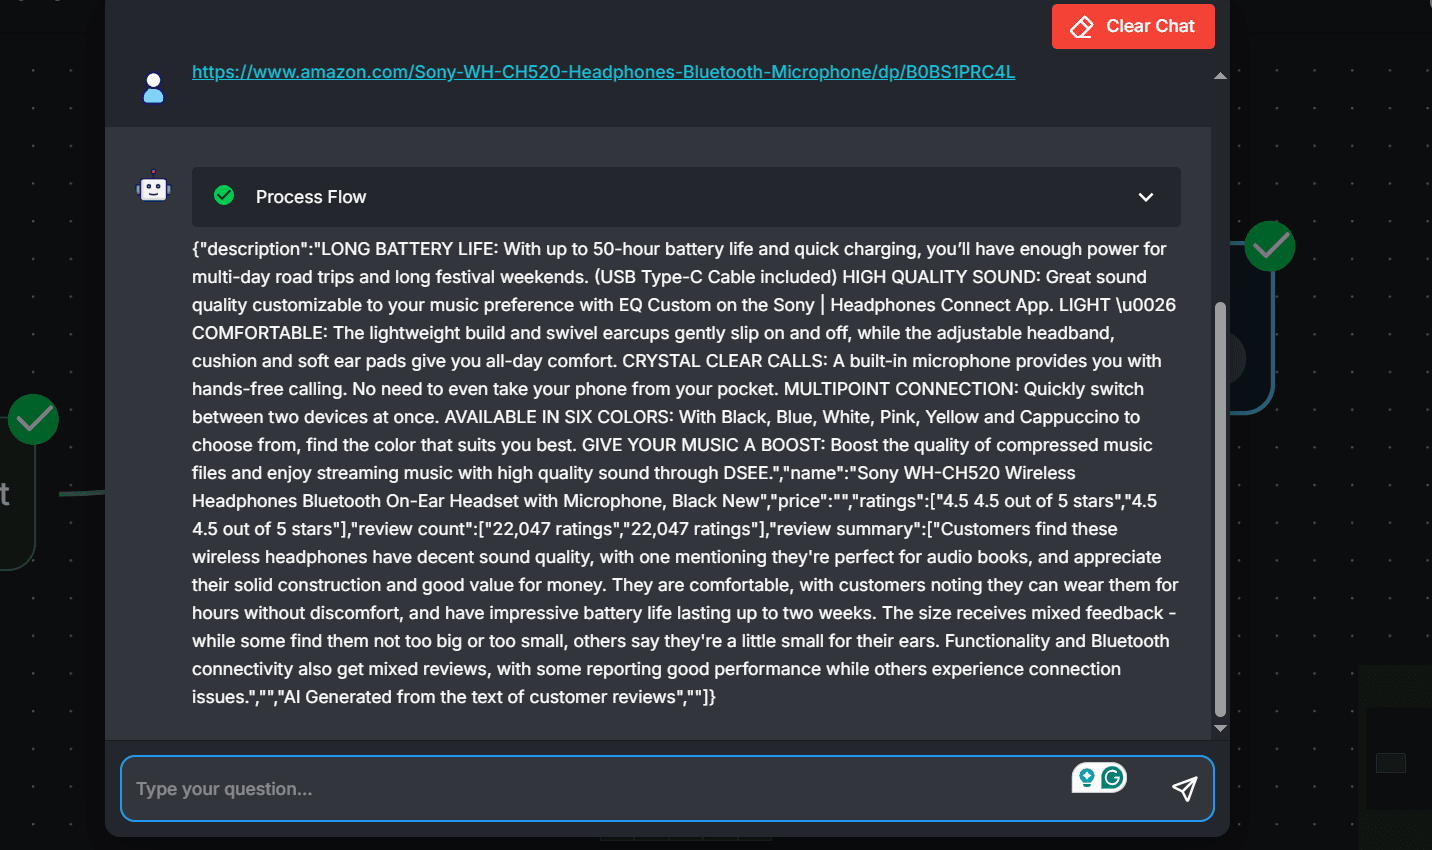
To run the flow, click the chat icon and send the URL of an Amazon product page in the chat. The model now streams the scraped data as a response in the chat box:
Advanced Integration: Demand Analysis System
Besides the HTTP option, you can also integrate Zenrows with Flowise using custom functions. We’ll see a real-life use case using the following agents:- Create an agent that scrapes an Amazon listing page based on a search term using Zenrows.
- Build an agent node to handle data cleaning.
- Create an agent to analyze the data using LLM.
Step 1: Create a custom web scraper function with Zenrows
-
Go to Agentflows and click
+ Add Newto start a new flow. - Click the save icon and name your flow.
-
Click
+at the top left of the Flowise canvas. -
Search for
Custom Functionand drag its card to the canvas. -
Link the Start node with the Custom Function agent.
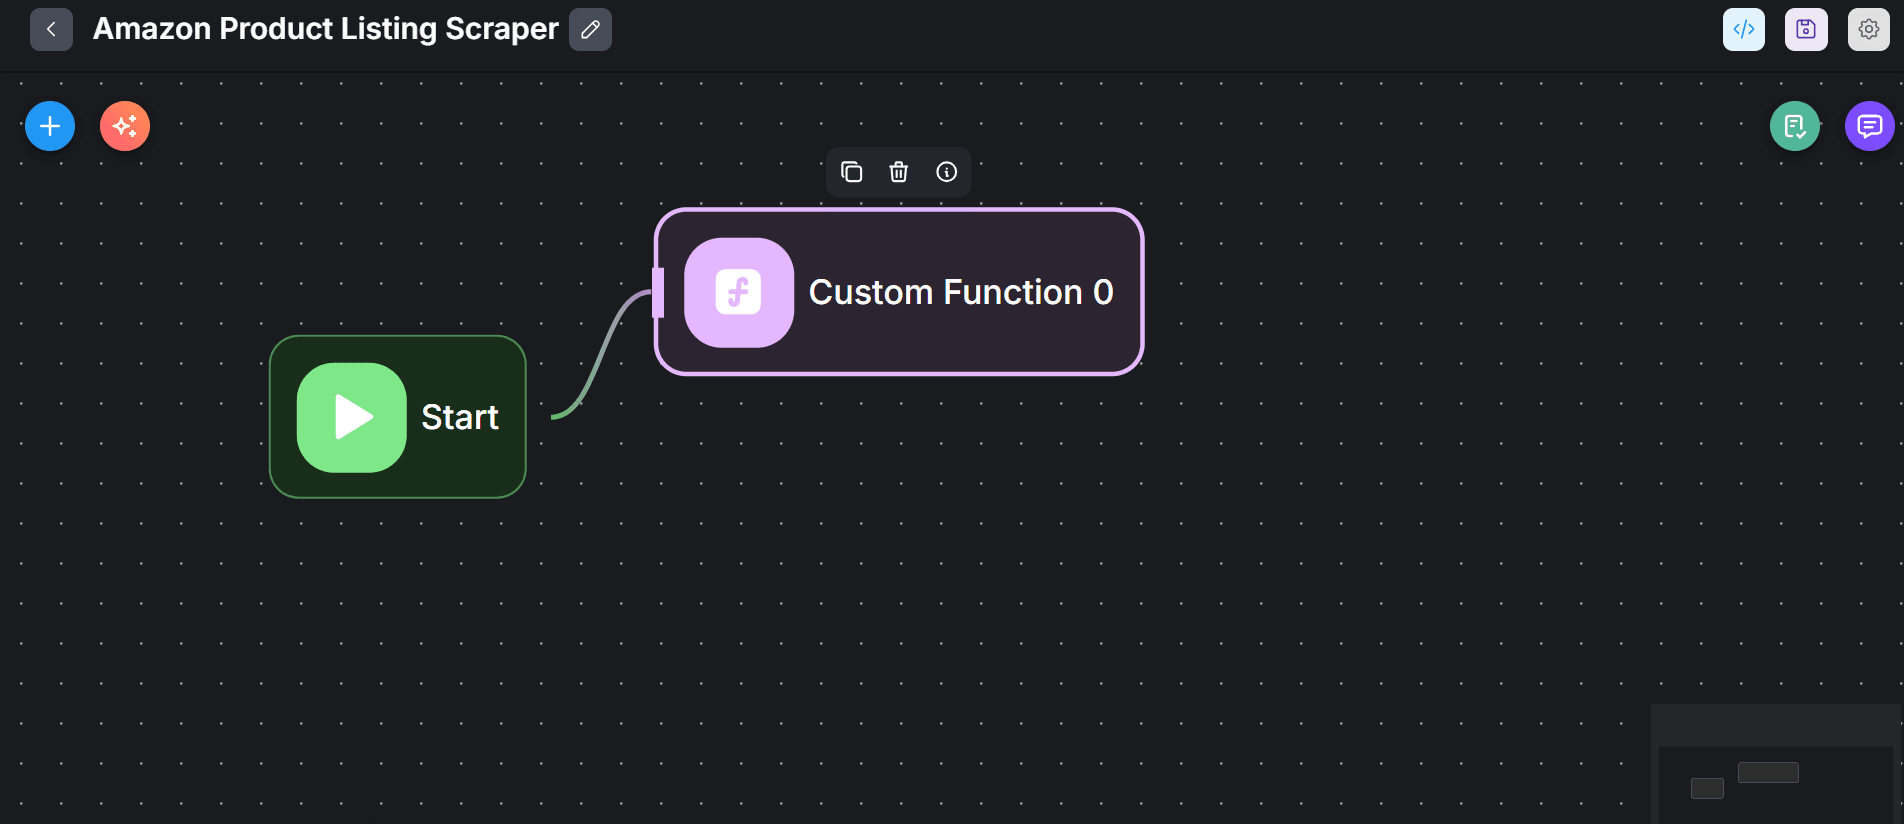
- Double-click the Custom Function agent and rename it.
-
Initiate the Zenrows scraping logic inside the JavaScript Function field. Import
axios, configure the target URL to accept a search term, and load your Zenrows API key from the Flowise environment variables.Node.js -
To create the
searchTermvariable, click+ Add Input Variables. -
Type
searchTerminside the Variable Name field. -
We want the scraping logic to accept this search term dynamically from the user’s question in the chat box. Type
{{in the Variable Value and selectquestion.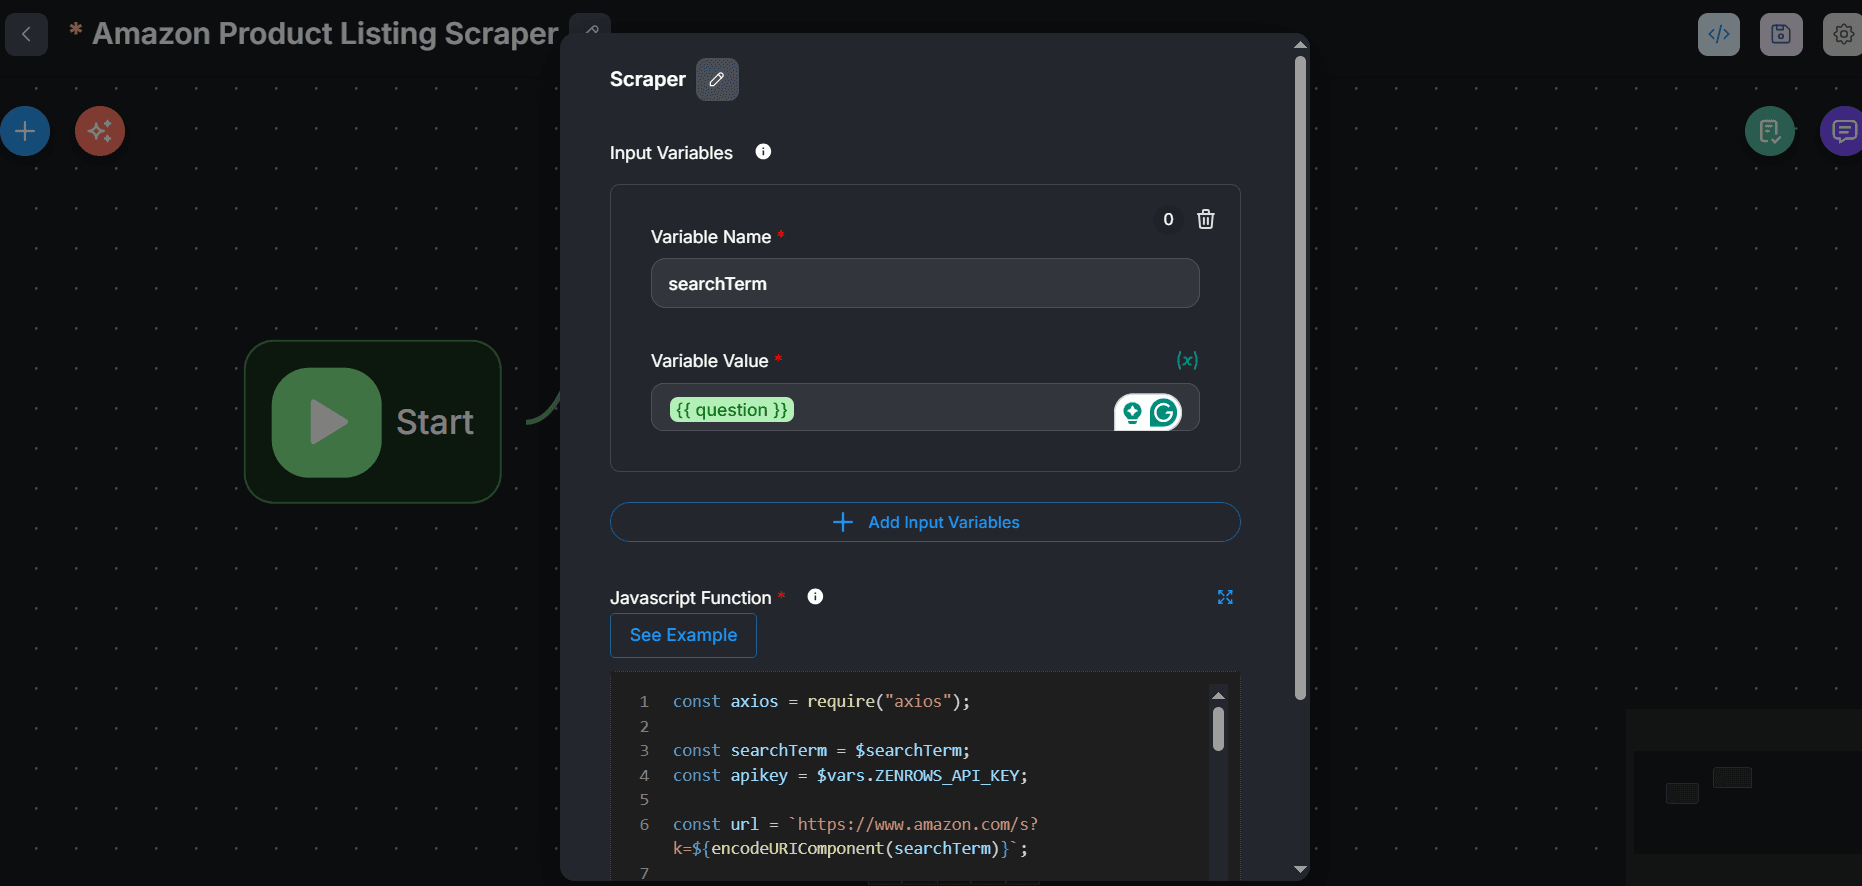
-
Extend the scraping logic by adding the required Zenrows parameters. Scrape the data using the
css_extractorand return the response data. See the complete code below:Node.js -
Click the save icon at the top right to save your changes.
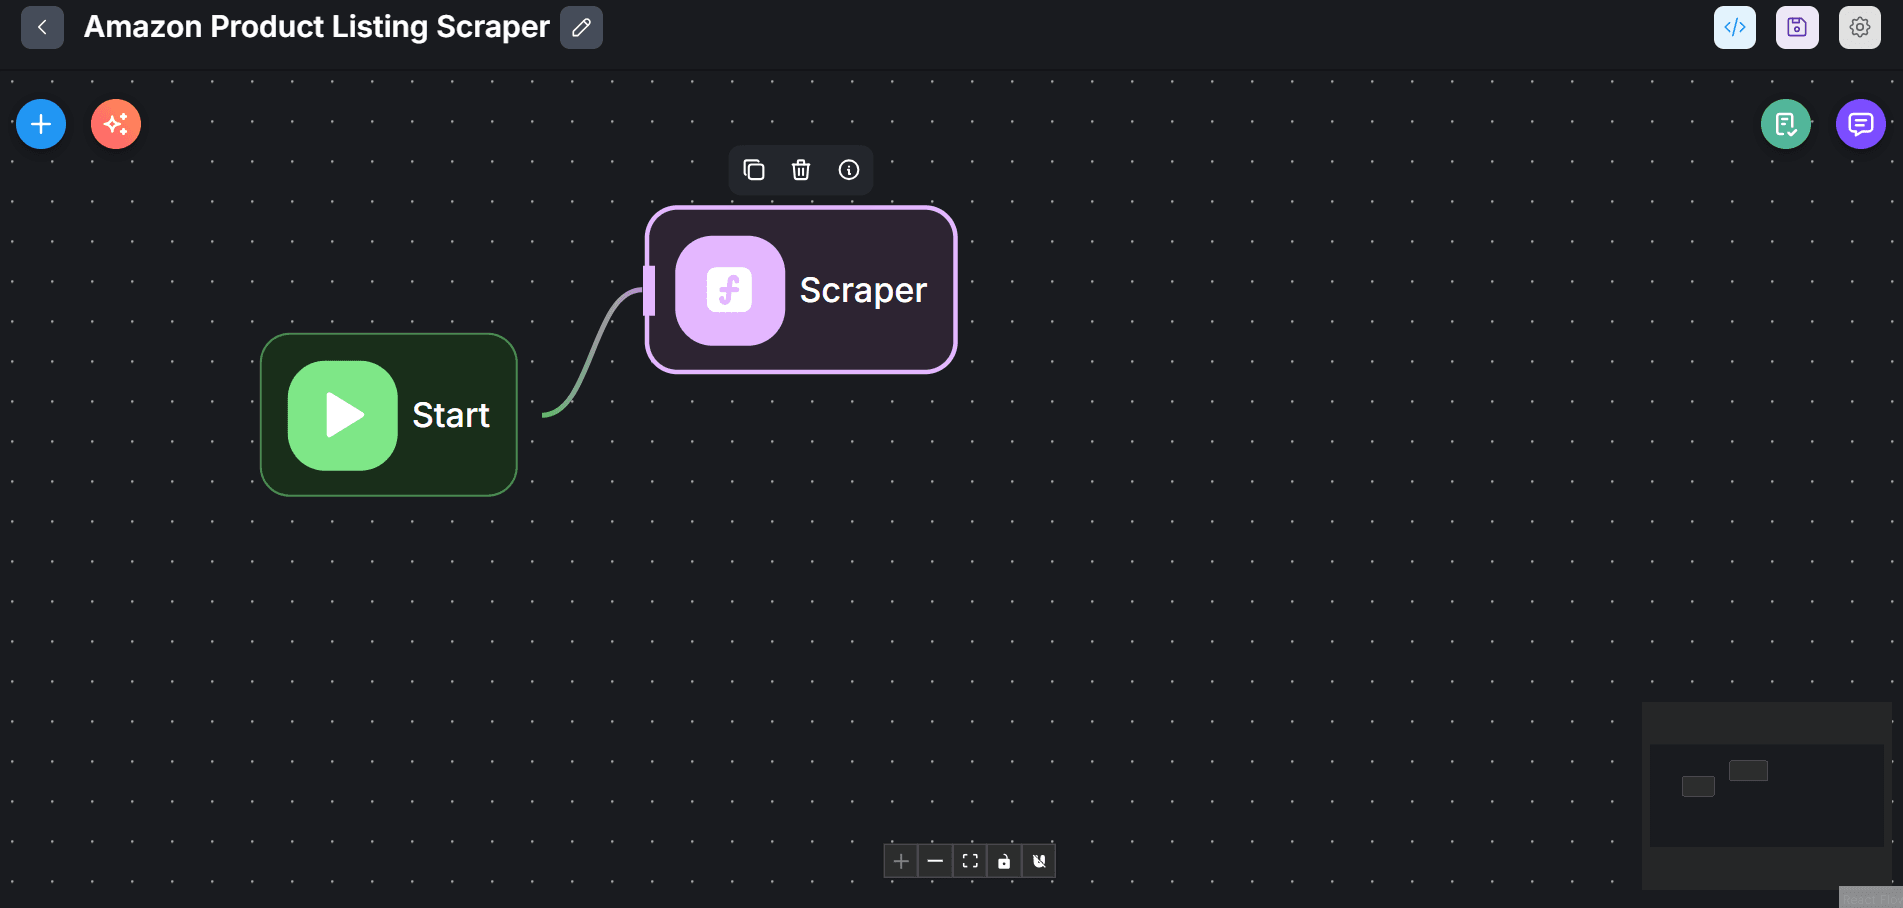
Step 2: Create a data cleaning agent
-
Click the
+icon. - Search for Custom Function and drag and drop it onto the canvas.
-
Link this new custom function agent with the Scraper agent.
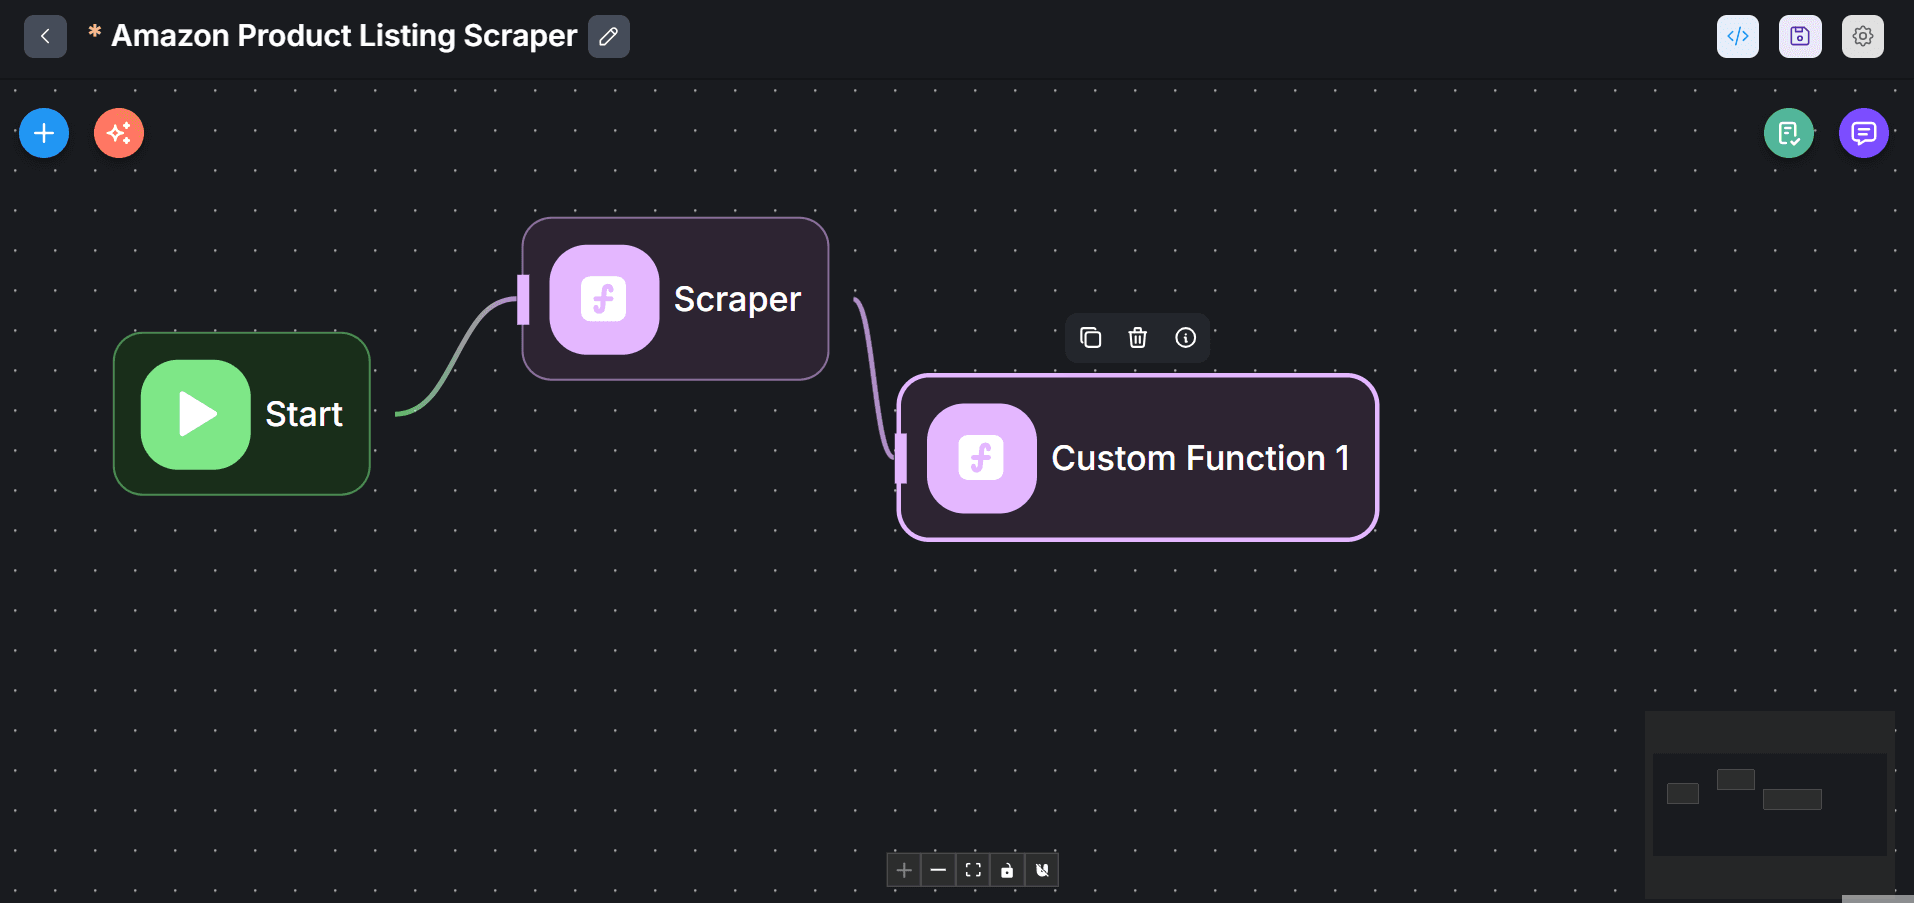
-
Double-click the
Custom Function 1agent node and rename it (e.g., Data Cleaner).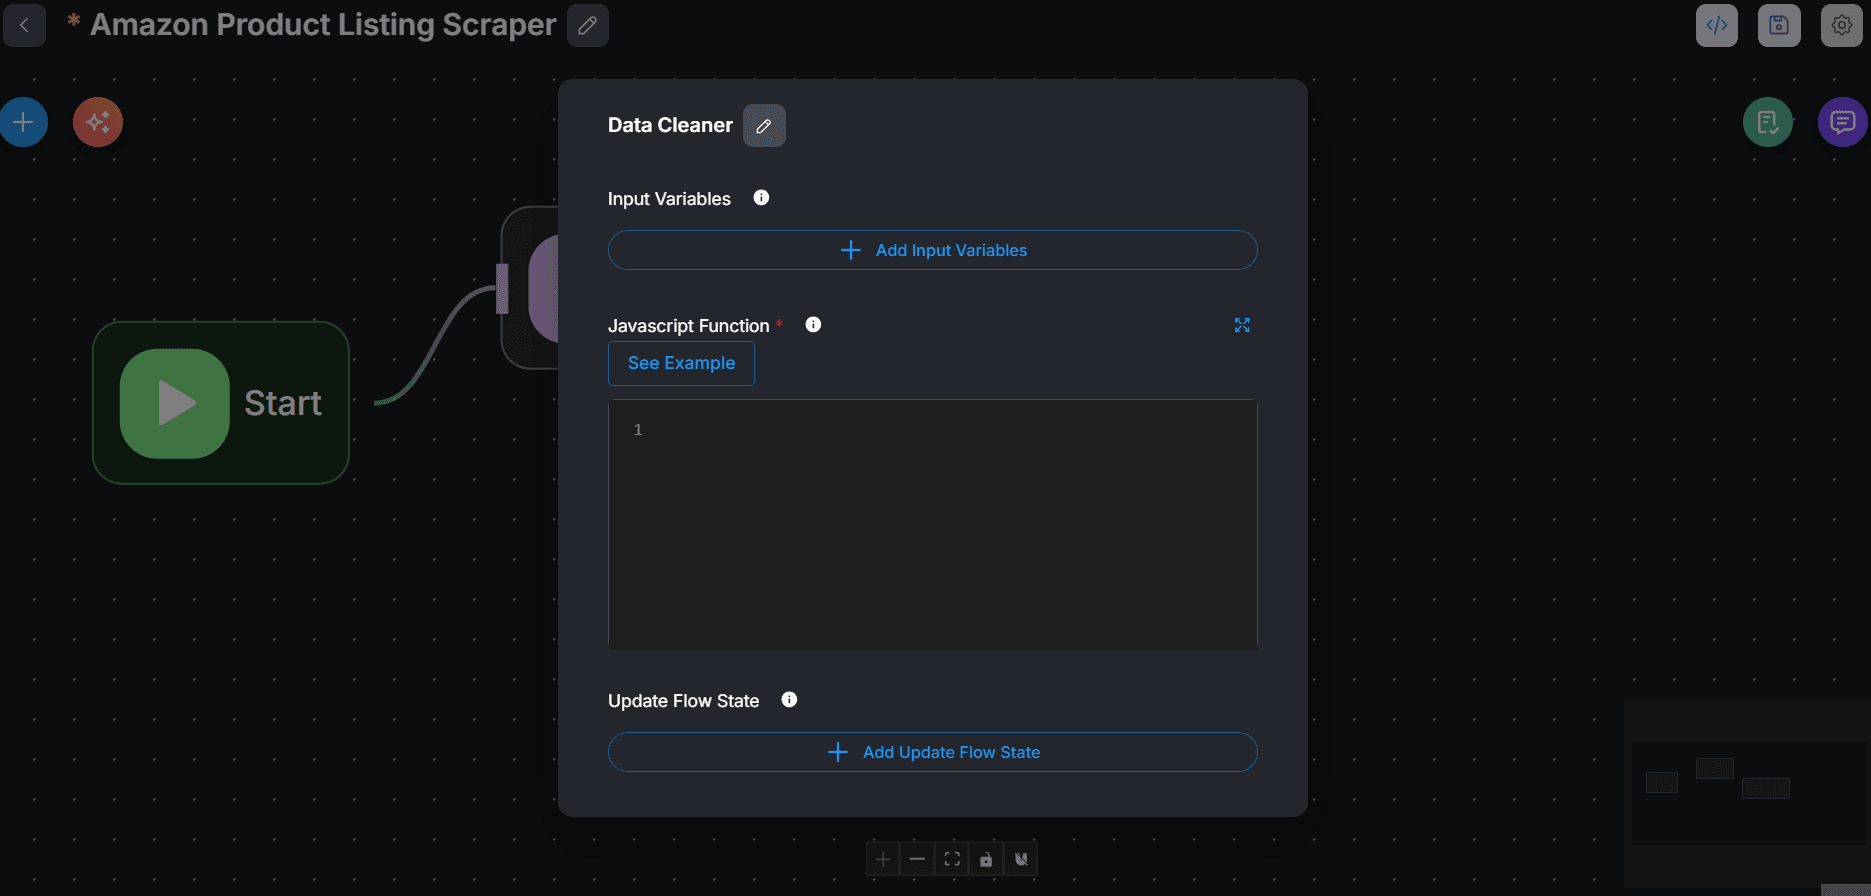
-
We need to load the Scraper agent’s output into the Data Cleaner agent node. Create this variable by clicking
+ Add Input Variables. Then, type scrapedData in the Variable Name field. Then, enter{{in the Variable Value field and selectcustomFunctionAgentflow_0.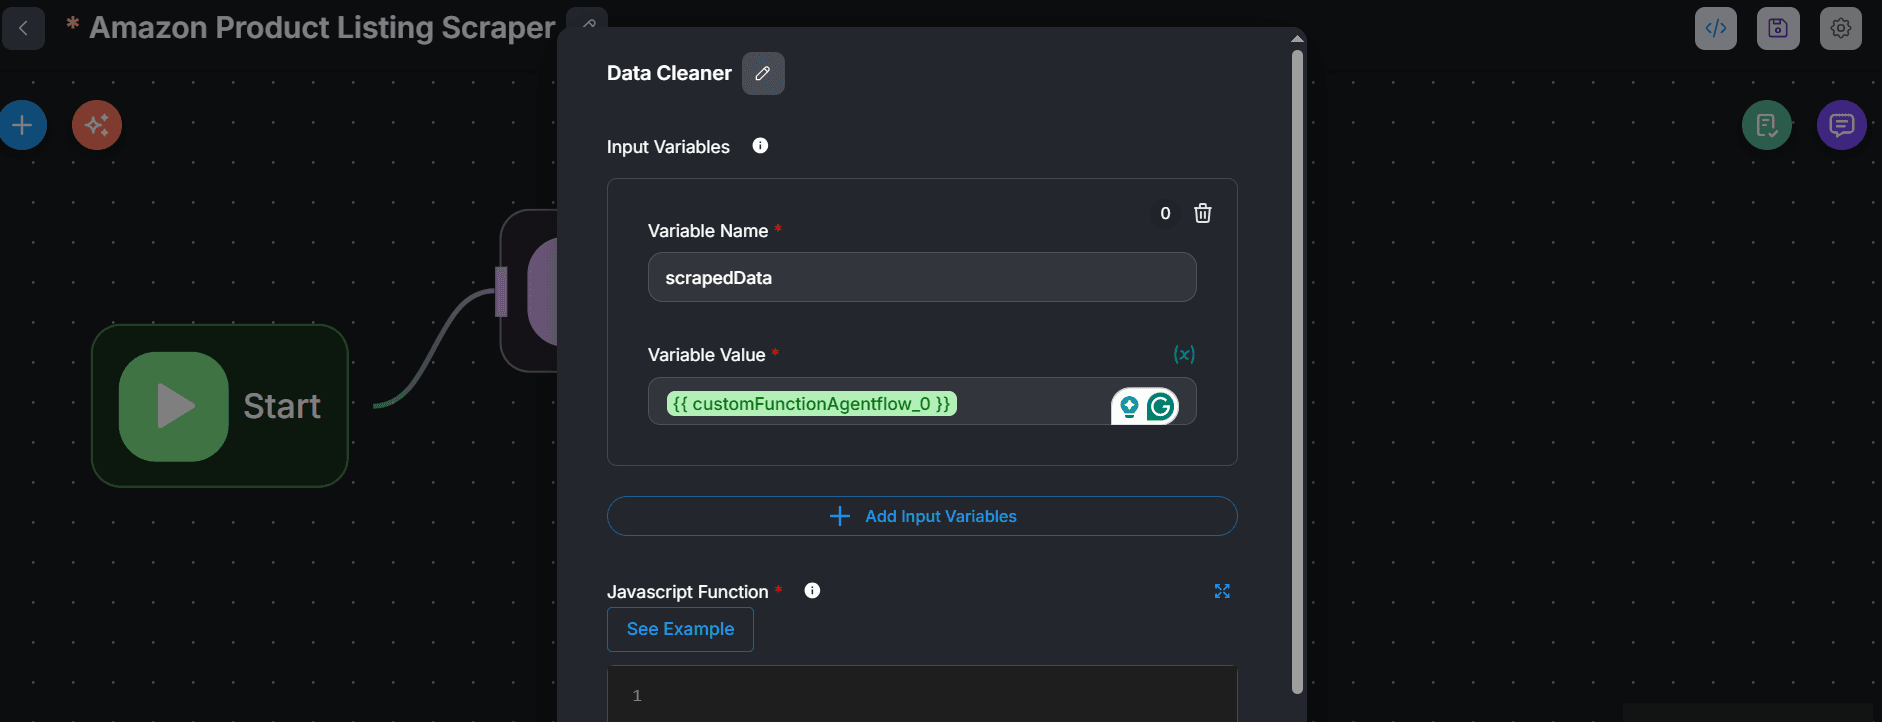
-
Enter the following data cleaning code in the JavaScript Function field. This code first converts the scraped data into an object, merges it, and fixes anomalies, such as data inconsistencies.
Node.js
-
Click anywhere on the canvas and click the save icon.
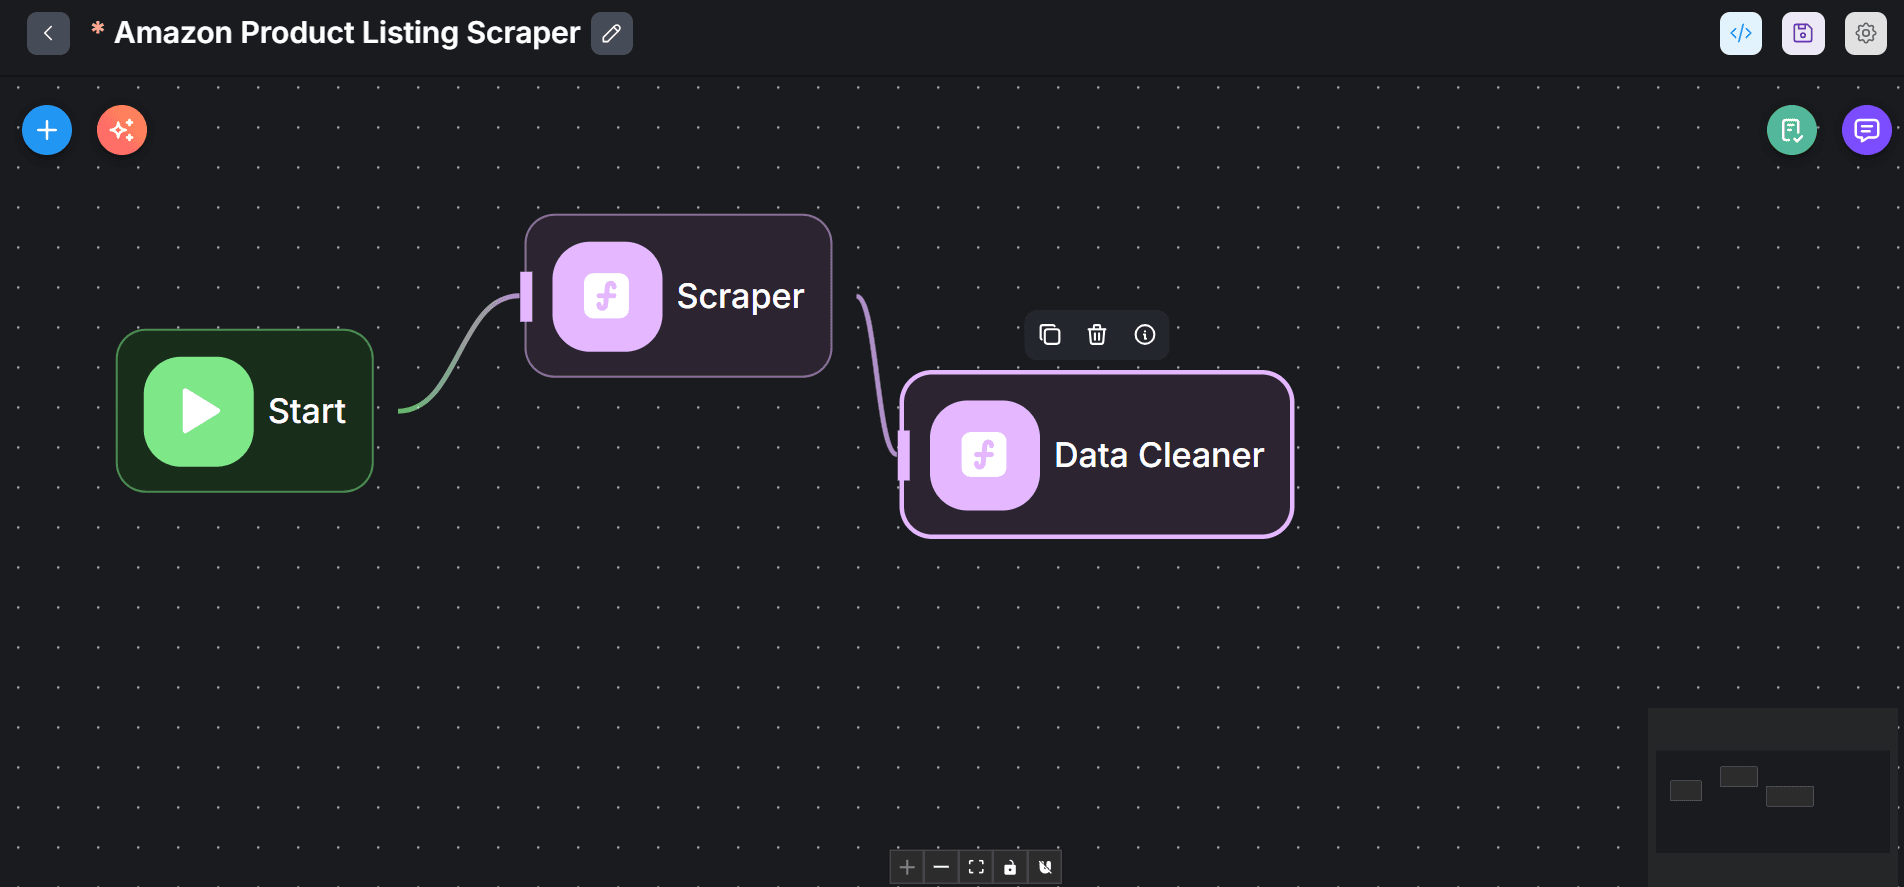
Step 3: Create a Data Analyst Agent LLM
-
Click the
+icon. - Search for LLM and drag and drop it into the canvas.
-
Link the LLM agent with the Data Cleaner agent. The LLM will act on the cleaned data returned from the Data Cleaner agent.
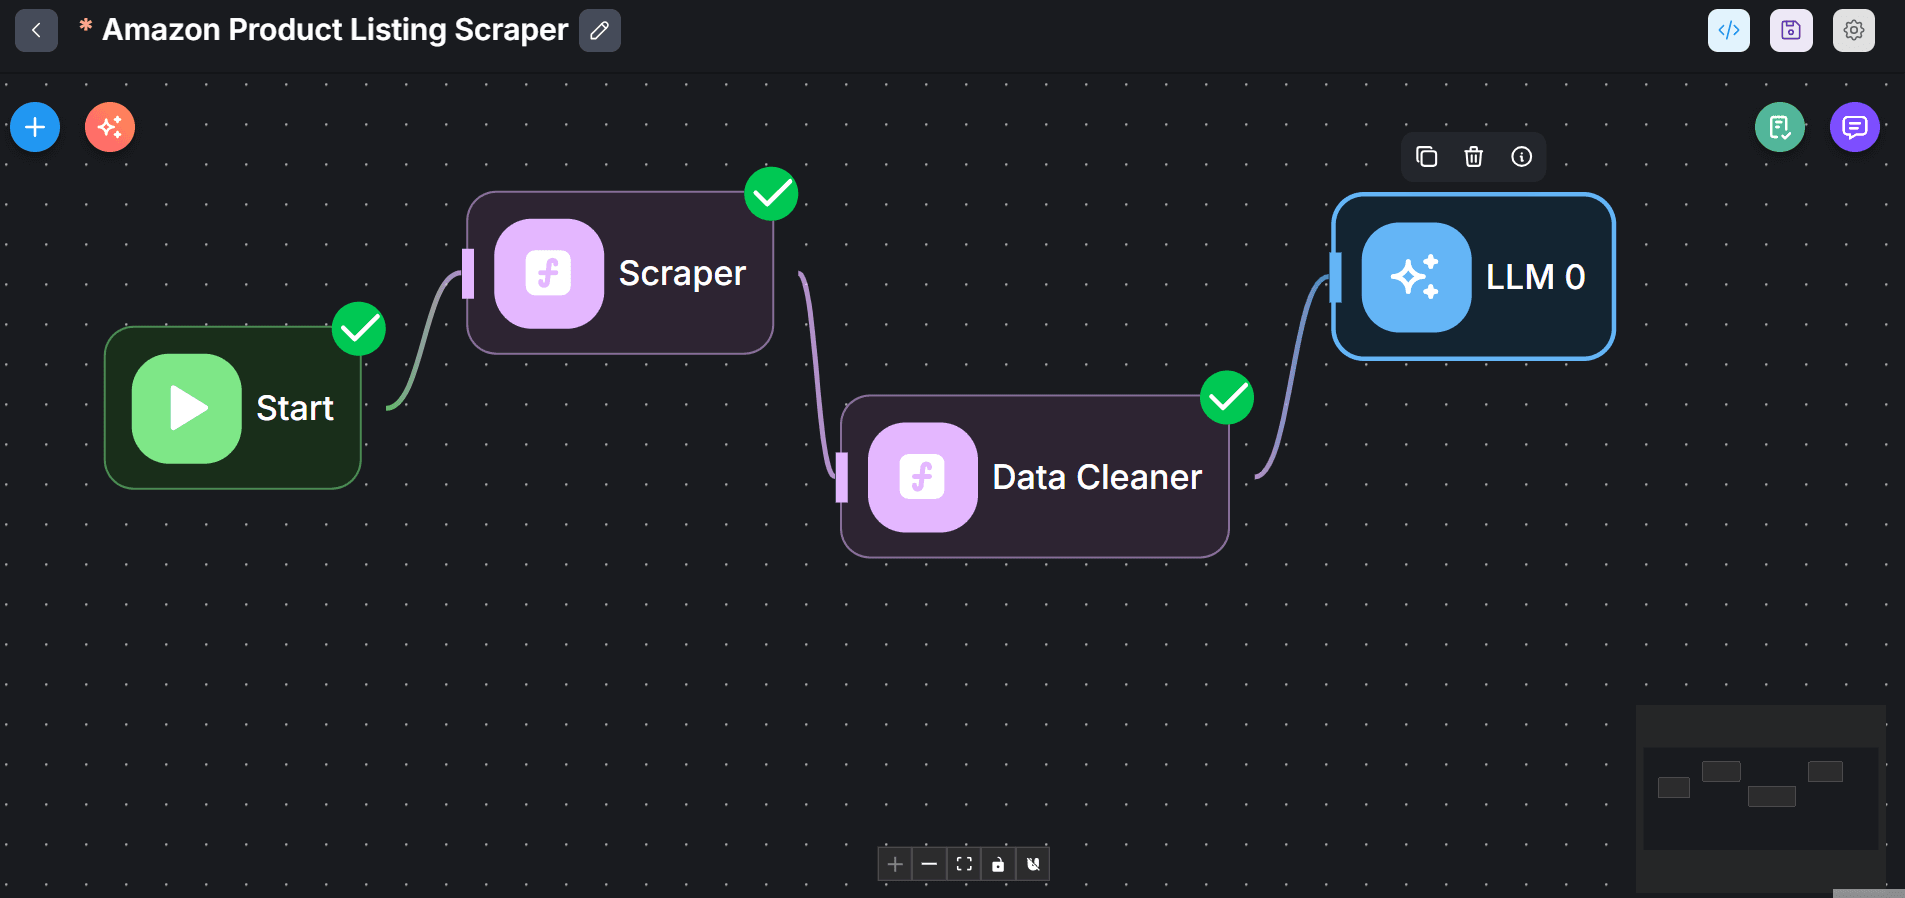
- Double-click the LLM agent and give it a descriptive name.
-
From the Model dropdown, search and select
ChatOpenAIor your preferred model. -
Set up your credentials, select your model, and choose a temperature.
-
Click
+ Add Messagesunder the Messages section. -
Create a prompt that instructs the Analyst agent to get the most in-demand products from the cleaned data and establish a correlation between price and demand. We’ll use the following prompt, where
customFunctionAgentflow_1is the cleaned data from the Data Cleaner agent node. -
Under Role, select
Assistant. Then, enter the prompt into the Content field.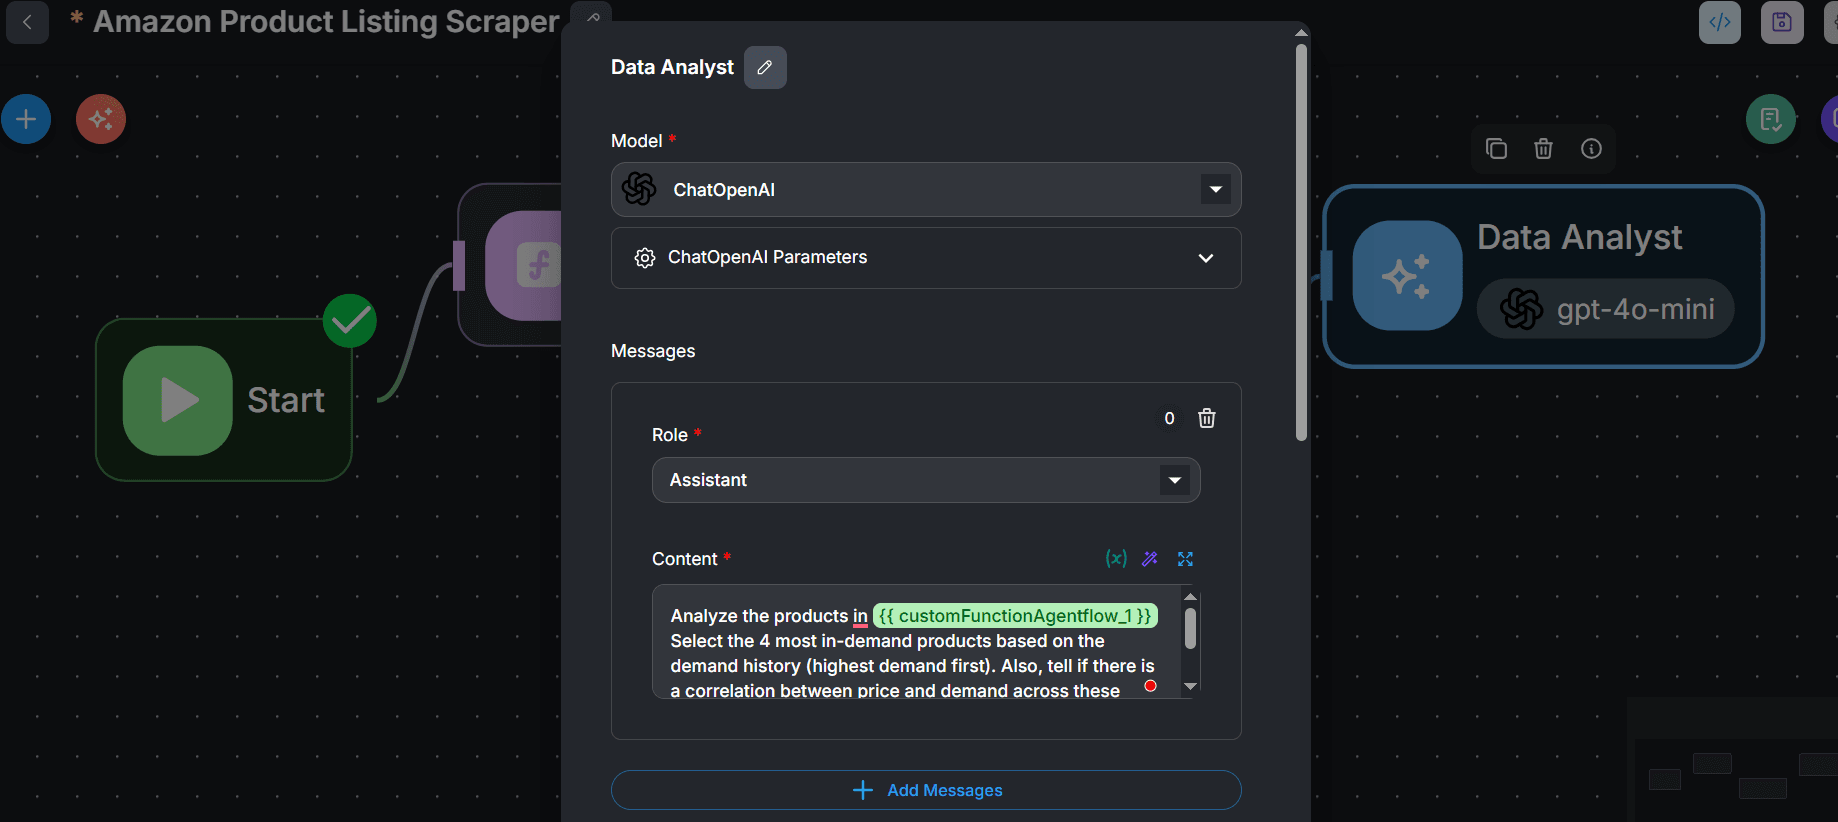
-
Under Return Response As, select
Assistant Message.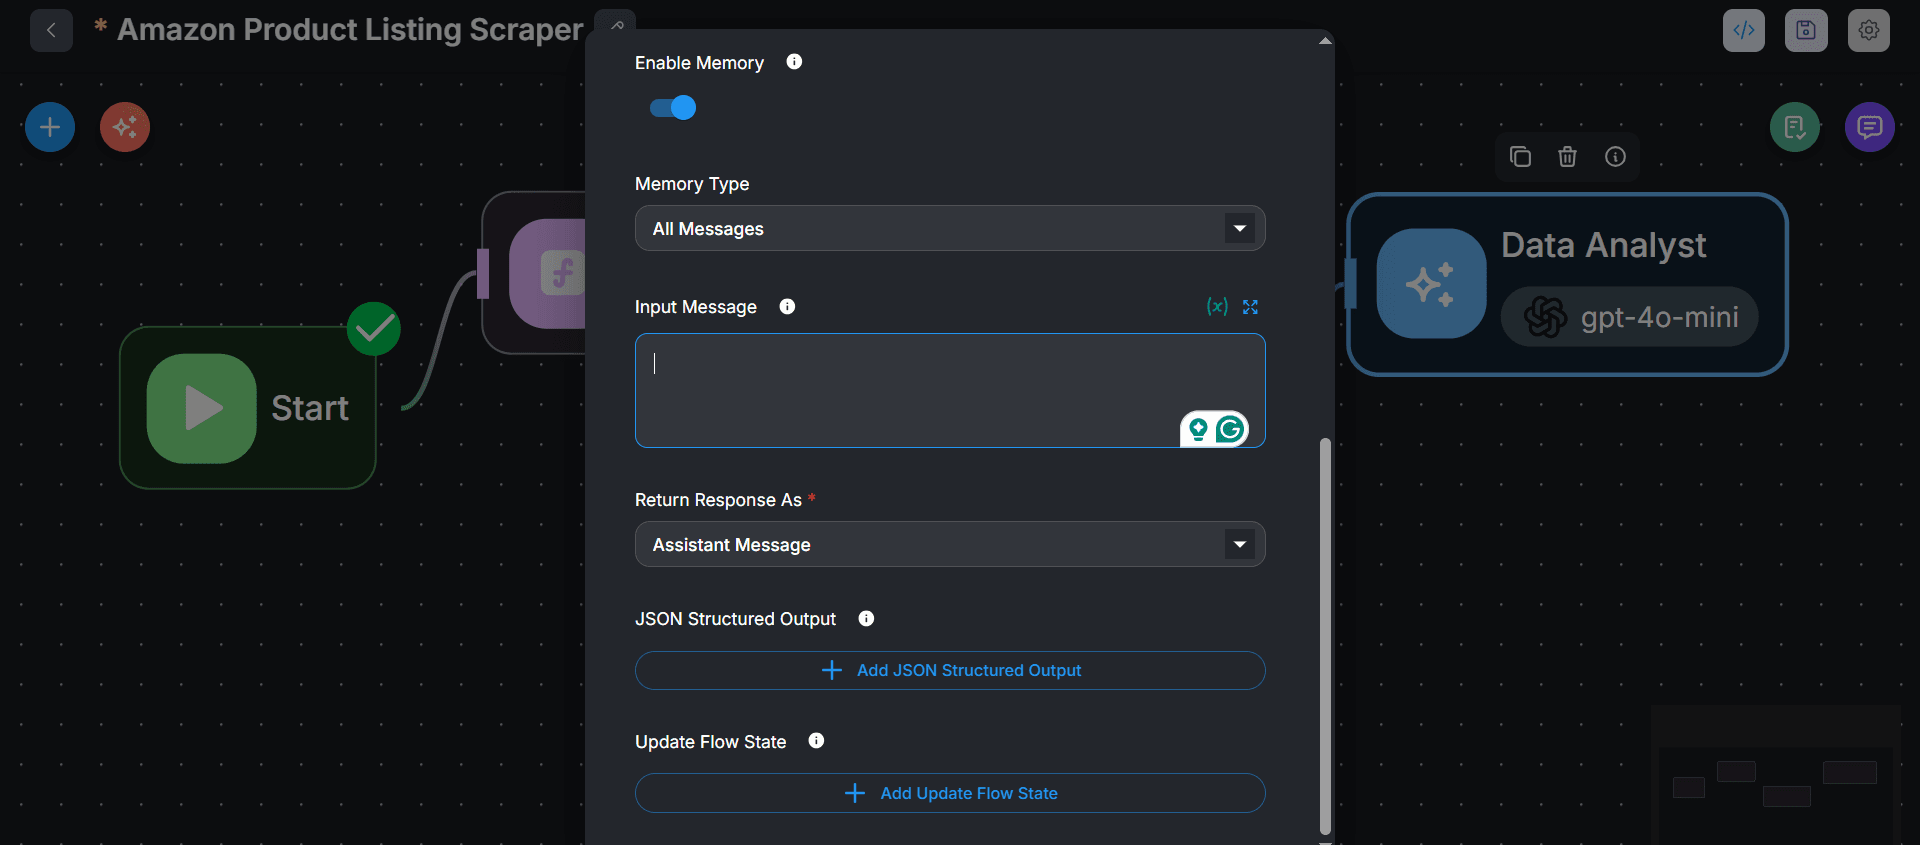
- Finally, validate and save your workflow by clicking the validation and save icons at the top right, respectively.
Step 4: Run the demand analysis workflow
Click the message icon to initiate a chat. Then, prompt the Analyst agent with a product search term (e.g., headphones, mouse, or teddy bears). Here’s a sample response for “mouse” product listings: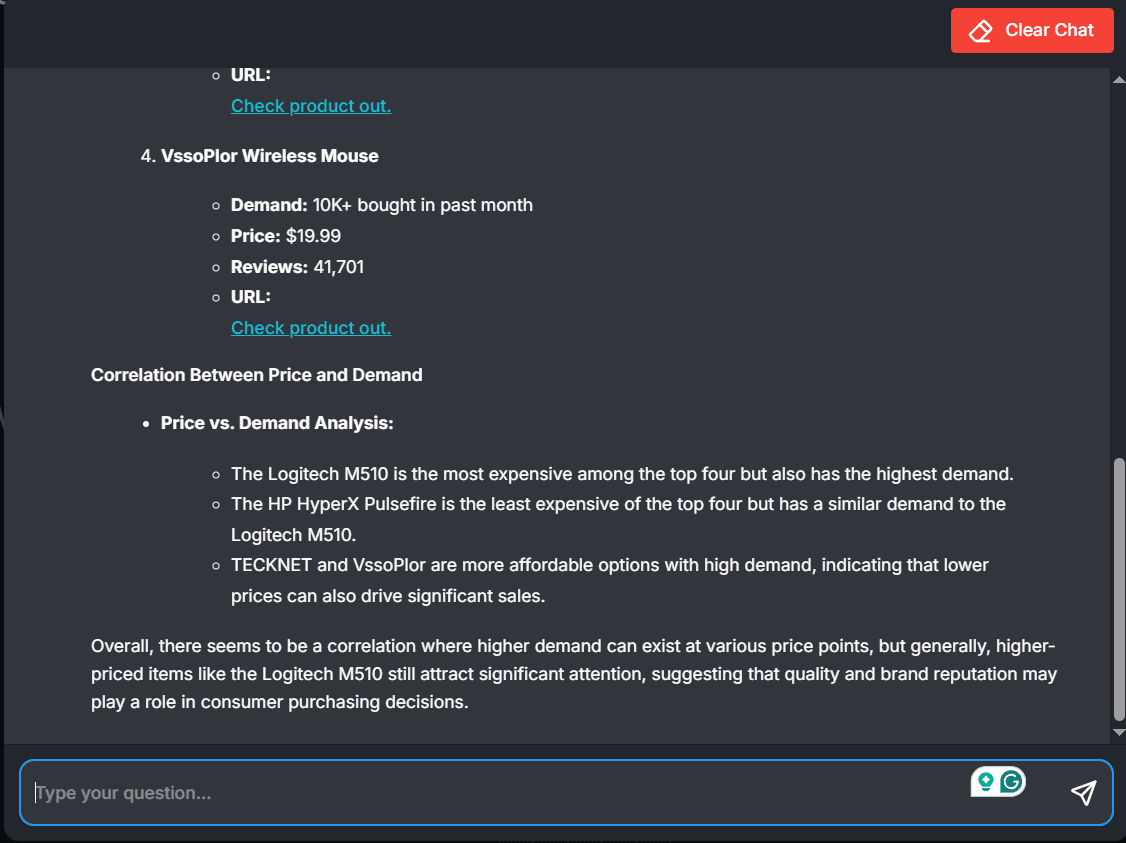 Congratulations! 🎉 You just built a product research workflow with Zenrows and Flowise integration.
Troubleshooting
Error 401 or Zenrows authentication error
- Solution 1: Ensure you’ve entered the correct Zenrows API key in the Flowise environment variables.
- Solution 2: Ensure you load the Zenrows API key into your scraping workflow.
Error 400
- Solution 1: Make sure the supplied Zenrows parameters are correct and don’t contain unsupported strings.
- Solution 2: Use the correct CSS selectors and format the
css_extractorarray correctly.
LLM agent fails
- Solution 1: Check your network connectivity and try your prompt again.
- Solution 2: Ensure you still have enough API credit for your chosen LLM.
- Solution 3: Make sure you’ve supplied the correct API key of your LLM agent.
Custom function fails
- Solution 1: Execute the code in an external text editor, such as VS Code, and simulate the expected output for debugging.
- Solution 2: Make sure all variables in your code are listed as Input Variables.
localhost unavailable or the Flowise interface doesn’t load
- Solution: Stop and restart the running server. Then, reload the Flowise interface.
Conclusion
You’ve learned to connect Zenrows with Flowise for a streamlined data flow across several agents, including data collection, cleaning, and analysis. While Flowise enables you to build agentic workflows for data automation and other purposes, Zenrows ensures the integrity of your data pipeline with a consistent data supply.Frequently Asked Questions (FAQ)
Will Zenrows charge me extra for integrating Flowise?
Will Zenrows charge me extra for integrating Flowise?
Zenrows doesn’t charge you extra for integrating with Flowise. Flowise is also an open-source tool with no initial cost implications. Although Flowise charges for advanced features like cloud hosting, the free plan provides most of what you need, including building Agentflows, Chatflows, Assistants, and more.
Are there alternatives to Flowise?
Are there alternatives to Flowise?
Yes, Zenrows integrates with other AI-powered low-code and no-code workflow tools, including Pipedream, Make, Clay, Zapier, and more. Check our integration options for more details.
Can I save the extracted data from Flowise to Google Sheets?
Can I save the extracted data from Flowise to Google Sheets?
Although Flowise supports Google Sheets as a tool, connecting to it involves some technical steps. Currently, Flowise has limitations in terms of Google Sheets write operations compared to tools like Zapier, which offer easier and more seamless integration.
Does Zenrows bypass anti-bots on Flowise?
Does Zenrows bypass anti-bots on Flowise?
Yes, integrating Zenrows with Flowise enables your scraper agent to bypass anti-bots easily.